I've sunk back into a lull of not blogging; but I did want to share a very easy pasta recipe that I made when the family was in town.
Overwhelmed with the harvest of tomatoes, and also a request for pasta on a steak night, I threw together something entirely from the garden.
It's a light, tangy, tomato sauce, and perfect for a late summer evening. The best part of it? It only takes 5 ingredients & 15 minutes!
Summer Fresh Tomato Pasta
Serves 4
2 cups Tomatoes, diced/halved if cherry
3 cloves garlic, sliced
1 ea lemon, zested & juiced
1/2 cup Basil, chiffonade
2 tbs Olive Oil
Salt & Pepper to taste
4 servings noodle pasta, cooked according to directions
Heat olive oil in a heavy pan, add garlic, and cook till tender, but not browned
Add the tomatoes, lemon juice & lemon zest
Cook on high until tomatoes are soft, and liquid is mostly cooked down, depending on how thick you like the sauce
Season to taste
Stir in the basil chiffonade
Toss with pasta & serve
Showing posts with label Pasta. Show all posts
Showing posts with label Pasta. Show all posts
Thursday, October 20, 2011

Wednesday, July 21, 2010
It'll always work out with spinach
After a long pasta hiatus, I decided to go easy, and doth exercise of making dinner with whatever I had in my kitchen.
The goods:
Garlic, Frozen Spinach, Anchovies, Parmesan
The Dish:
Oglio Olio with Spinach and Anchovies
It qualifies as a 10-minute meal, and now I have a new recipe!

Serves 2
12 oz Frozen Spinach
4 cloves Garlic, thinly sliced
4 ea Anchovy Fillets, chopped
2 Tbs Olive Oil
1/2 cup Parmesan cheese, grated
2 servings of noodle pasta, cooked
1. Heat 2 tbs of oil in a saute pan
2. Add garlic and cook till fragant and translucent, and browned on the edges
3. Add spinach and cover, steam till tender and hot throughout
4. Toss pasta, anchovies, cheese, and garlic
5. Season with salt & serve with fresh black pepper
The goods:
Garlic, Frozen Spinach, Anchovies, Parmesan
The Dish:
Oglio Olio with Spinach and Anchovies
It qualifies as a 10-minute meal, and now I have a new recipe!
Serves 2
12 oz Frozen Spinach
4 cloves Garlic, thinly sliced
4 ea Anchovy Fillets, chopped
2 Tbs Olive Oil
1/2 cup Parmesan cheese, grated
2 servings of noodle pasta, cooked
1. Heat 2 tbs of oil in a saute pan
2. Add garlic and cook till fragant and translucent, and browned on the edges
3. Add spinach and cover, steam till tender and hot throughout
4. Toss pasta, anchovies, cheese, and garlic
5. Season with salt & serve with fresh black pepper
Friday, June 25, 2010
Keep Calm & Carry On
I can never turn away a hungry person.
Largely, the joy in cooking comes from seeing others enjoy my food, and while it's a rare gift to always be able to satisfy an appetite, I've learned to use it well.
I've also made it a habit to always have something available in my fridge, so that I can put together a meal quickly and easily, because often, there isn't time to go to the store when I have surprise guests.
By far, my most outstanding meal, was a dinner that I prepared for 6 people (myself included), with about 5 minute notice. I had some friends stop by, and invited them to dinner - so it was originally just 3 people at the last minute. Then, friends of friends showed up, and within minutes, the dinner table had expanded 100% to 6 people.
The initial dinner plan for 3 people was a light & casual gnocchi dish with bacon and peas, tossed in that awesome Pesto a le Monde. However, with this extended guest list, I had to think of something more appropriate (That would severely undermine my talent as a chef). The bacon and peas were already in the pan cooking, and so I decided to extend this and make a creamy pesto sauce, and toss it with spaghetti instead.
Pancetta and Peas is always super successful, so I brought the technique of mixing in egg yolk and cream into the sauce to stretch out that last bit of pesto that I had left.

In line with my philosophy to always store something in the fridge, I quick braised some frozen OMG meatballs in a half bottle of red wine that I also had left from spaghetti & meatballs a week ago.

Now that I had the entree and side protein sorted out - the only thing that was missing was a salad. My cheese drawer had some fresh bocconcini, so I tossed that with some fresh avocado, good olive oil (a must have in anyone's pantry), and ripe apricots, which are of course in season right now.

To much surprise, it really wasn't that difficult to pull off, and really, I could never turn strangers away, for without knowing, some have entertained angels in disguise.

Pesto, Peas, and Pasta
Serves 6
8 oz Bacon Rashers, diced
12 oz Frozen Peas
1 cup Pesto
1 cup Half & half
4 ea Egg Yolks
1 cup Grated Parmesan Cheese
6 portions Noodle Pasta, like linguine, fettucine, or spaghetti
1. Bring a pot of heavily salted water to a boil, and add the noodles
2. In a smaller pot, add scald the half and half, and reduce by about half
3. Heat a heavy sautepan, and add the bacon rashers, until browned
4. Remove most of the bacon drippings, leaving about 2 tablespoons
5. Add the frozen peas, and cover, cooking till peas are thawed out and hot
6. Quickly whisk the egg yolks and slowly temper in the hot half and half
7. Strain pasta, and then toss egg mixture, peas, bacon, and parmesan together
8. Season with freshly cracked pepper and serve immediately
Largely, the joy in cooking comes from seeing others enjoy my food, and while it's a rare gift to always be able to satisfy an appetite, I've learned to use it well.
I've also made it a habit to always have something available in my fridge, so that I can put together a meal quickly and easily, because often, there isn't time to go to the store when I have surprise guests.
By far, my most outstanding meal, was a dinner that I prepared for 6 people (myself included), with about 5 minute notice. I had some friends stop by, and invited them to dinner - so it was originally just 3 people at the last minute. Then, friends of friends showed up, and within minutes, the dinner table had expanded 100% to 6 people.
The initial dinner plan for 3 people was a light & casual gnocchi dish with bacon and peas, tossed in that awesome Pesto a le Monde. However, with this extended guest list, I had to think of something more appropriate (That would severely undermine my talent as a chef). The bacon and peas were already in the pan cooking, and so I decided to extend this and make a creamy pesto sauce, and toss it with spaghetti instead.
Pancetta and Peas is always super successful, so I brought the technique of mixing in egg yolk and cream into the sauce to stretch out that last bit of pesto that I had left.
In line with my philosophy to always store something in the fridge, I quick braised some frozen OMG meatballs in a half bottle of red wine that I also had left from spaghetti & meatballs a week ago.
Now that I had the entree and side protein sorted out - the only thing that was missing was a salad. My cheese drawer had some fresh bocconcini, so I tossed that with some fresh avocado, good olive oil (a must have in anyone's pantry), and ripe apricots, which are of course in season right now.
To much surprise, it really wasn't that difficult to pull off, and really, I could never turn strangers away, for without knowing, some have entertained angels in disguise.
Pesto, Peas, and Pasta
Serves 6
8 oz Bacon Rashers, diced
12 oz Frozen Peas
1 cup Pesto
1 cup Half & half
4 ea Egg Yolks
1 cup Grated Parmesan Cheese
6 portions Noodle Pasta, like linguine, fettucine, or spaghetti
1. Bring a pot of heavily salted water to a boil, and add the noodles
2. In a smaller pot, add scald the half and half, and reduce by about half
3. Heat a heavy sautepan, and add the bacon rashers, until browned
4. Remove most of the bacon drippings, leaving about 2 tablespoons
5. Add the frozen peas, and cover, cooking till peas are thawed out and hot
6. Quickly whisk the egg yolks and slowly temper in the hot half and half
7. Strain pasta, and then toss egg mixture, peas, bacon, and parmesan together
8. Season with freshly cracked pepper and serve immediately
Monday, June 21, 2010
Pesto a le Monde
Pesto is one of things things that you always want to have in your fridge. It keeps and freezes well, and you can use it on almost anything - from pasta sauce to chicken marinade, and then a sauce for meats.
Most international cuisines have some sort of pesto - a mixture of herb, garlic, and oil. There's gremolata, chimichurri, and of course, by far the most famous, the pesto classico - a gorgeous combination of fresh basil, garlic, pine nuts, Parmesan, and then some good olive oil. Yum. Now that summer is here, my basil plant is a lot like my life right now - overflowing with abundance :)
Don't get me wrong - while the original is still the best, mixing it up here allows me to get creative, and also shows what a simple ingredient switch can make a dish completely different, but still delicious; somewhat of a deja vu.
Pine nuts tend to be ridiculously expensive, so this time, I chose to go with roasted almonds instead. You can actually use almost any kind of nut, but roasted nuts bring out a smokier flavor than the blah uncooked ones.
I made about 2 cups with this, and then had a bit leftover, which saved my life the next day, when I had to make dinner for 6 on 5 minutes notice.
That's another pasta recipe, but here's the pesto - there's only one secret to good pesto. Never ever use pre-grated Parmesan.
Almond Pesto
1 cup loosely packed Basil leaves
4 cloves Garlic, finely minced
1/3 cup Roasted Almonds
1/2 cup Parmesan cheese, grated
1/2 ea Lemon, juiced
2/3 cup Good Olive oil
Salt & pepper to taste
Makes about 2 cups
Combine all ingredients except olive oil in a food processor
Process until roughly chopped
Gradually add olive oil in a stream until pesto is finely minced
Season with salt & pepper
Toss with pasta for a quick meal, serve hot or cold
Most international cuisines have some sort of pesto - a mixture of herb, garlic, and oil. There's gremolata, chimichurri, and of course, by far the most famous, the pesto classico - a gorgeous combination of fresh basil, garlic, pine nuts, Parmesan, and then some good olive oil. Yum. Now that summer is here, my basil plant is a lot like my life right now - overflowing with abundance :)
Don't get me wrong - while the original is still the best, mixing it up here allows me to get creative, and also shows what a simple ingredient switch can make a dish completely different, but still delicious; somewhat of a deja vu.
Pine nuts tend to be ridiculously expensive, so this time, I chose to go with roasted almonds instead. You can actually use almost any kind of nut, but roasted nuts bring out a smokier flavor than the blah uncooked ones.
I made about 2 cups with this, and then had a bit leftover, which saved my life the next day, when I had to make dinner for 6 on 5 minutes notice.
That's another pasta recipe, but here's the pesto - there's only one secret to good pesto. Never ever use pre-grated Parmesan.
Almond Pesto
1 cup loosely packed Basil leaves
4 cloves Garlic, finely minced
1/3 cup Roasted Almonds
1/2 cup Parmesan cheese, grated
1/2 ea Lemon, juiced
2/3 cup Good Olive oil
Salt & pepper to taste
Makes about 2 cups
Combine all ingredients except olive oil in a food processor
Process until roughly chopped
Gradually add olive oil in a stream until pesto is finely minced
Season with salt & pepper
Toss with pasta for a quick meal, serve hot or cold
Thursday, May 20, 2010
Re-Purpose this!
I secretly hid some of the leftover frozen meatballs from the Mother's Day tea that I did earlier in the month, and was craving some good old fashioned spaghetti and meatballs. I update the recipe a little so the sauce has a more contemporary character, but still very easy.
Following the "use what's leftover" philosophy that I (and my purse) are so fond of, I dug out from my fridge, sweet pepper, basil, and from the pantry, canned tomatoes, of course!
I pureed the sauce to give it a nice thick consistency, so you could keep it in the fridge and use it as a dip, or even thin it out and use it as a soup. I love recipes that can multi-task like that!
![]()
Red Spaghetti Sauce
Makes 1 quart
1/2 ea Yellow Onion, diced
3 cloves Garlic, sliced
1 ea Red Pepper, but yellow or orange works too
1 can Fire roasted tomatoes
1 cup Basil, chiffonade
2 tbs Olive Oil
1. Heat the oil in a saute pan and saute the onions until lightly browned
2. Add the Garlic, and cook till lightly browned
3. Add the Red pepper and saute for another 2 minutes, then add the tomatoes and basil
4. Cook for another 10 minutes, then puree mixture in blender
5. Bring red sauce back to a boil, and lower to a simmer until desired consistency is reached
6. Season with salt and pepper
Leave to cool then store in an airtight container in the fridge
If serving with meatballs, add the frozen meatballs, cover pan, and cook for an additional 10-15 minutes, or until meatballs are cooked through
Toss with spaghetti, and top with parmesan cheese
To serve as a soup, thin out sauce with an equal portion of chicken stock
Following the "use what's leftover" philosophy that I (and my purse) are so fond of, I dug out from my fridge, sweet pepper, basil, and from the pantry, canned tomatoes, of course!
I pureed the sauce to give it a nice thick consistency, so you could keep it in the fridge and use it as a dip, or even thin it out and use it as a soup. I love recipes that can multi-task like that!
Red Spaghetti Sauce
Makes 1 quart
1/2 ea Yellow Onion, diced
3 cloves Garlic, sliced
1 ea Red Pepper, but yellow or orange works too
1 can Fire roasted tomatoes
1 cup Basil, chiffonade
2 tbs Olive Oil
1. Heat the oil in a saute pan and saute the onions until lightly browned
2. Add the Garlic, and cook till lightly browned
3. Add the Red pepper and saute for another 2 minutes, then add the tomatoes and basil
4. Cook for another 10 minutes, then puree mixture in blender
5. Bring red sauce back to a boil, and lower to a simmer until desired consistency is reached
6. Season with salt and pepper
Leave to cool then store in an airtight container in the fridge
If serving with meatballs, add the frozen meatballs, cover pan, and cook for an additional 10-15 minutes, or until meatballs are cooked through
Toss with spaghetti, and top with parmesan cheese
To serve as a soup, thin out sauce with an equal portion of chicken stock
Sunday, April 18, 2010
Seasons of Spring
Been missing the blog recently since things have been hectic in the other (under?) world, but so far April has seen come pretty culinary colors, with my favorite season for produce!

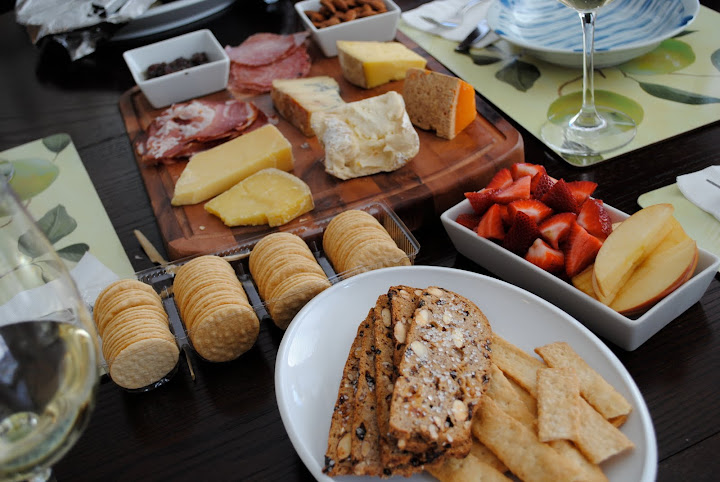
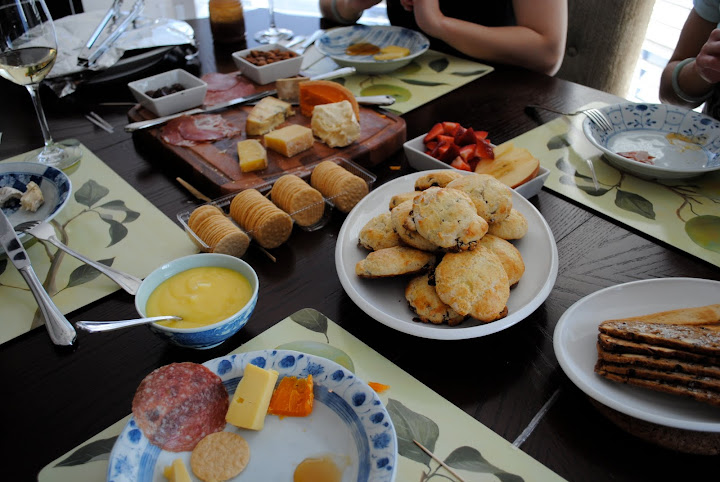
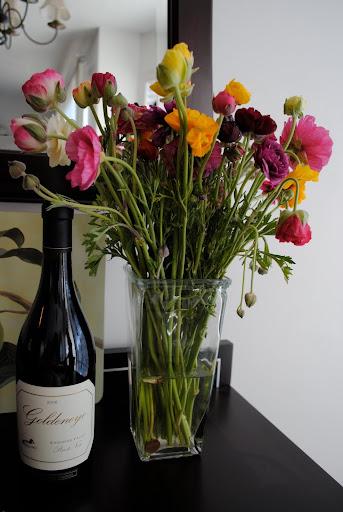
First, there was a tea party with the girls up in San Francisco, and I'm not sure how other people do tea, but we do it with lamb riblets, a cheese selection, and Chef Laura's all-time famous scones. I'm not sure where the tea was at tea, but there was some pretty good wine!
Not to mention Easter, where I contributed with an unforgettable marinade of green onion and fennel for the roasted lamb, and my signature Mediterranean quinoa salad with sundried tomatoes, green onion, squash, feta and a host of other delicious stuff.
Where would we be without contributions to the pasta book? New pasta creations include an Applewood smoked bacon and peas cappellini with poached eggs, a creamy Vegetarian peas and spinach risotto (c'mon, risotto falls under the the pasta category too), Gnocchi with bacon and spinach carbonara style (recipe below), and a special treat of red Italian sausage penne, where I didn't have to cook at all (Yes, I am still adding it to the book and claiming credit)!


A special friend came in from Portland, and I tried my best to align the menu with their health conscious goals. You can't have a special dinner without an appetizer or dessert, so a tomato and roasted garlic soup served up with some crunchy bread and creme brulee were a prelude and postlude to the entree of delicious slow roasted salmon, spicy corn salad, and a chile verde sauce.


Speaking of chile verde, Gigya had a chile competition to celebrate our Q1 close, and instead of Texas chile, I spiced it up with my contribution of oxtail chile verde, served up with some queso fresco, sour cream and corn bread, and I won!

More to come I'm sure - the rest of Spring awaits!
Carbonara Gnocchi
Serves 2
4 oz Bacon, diced
3 cups Spinach (anything except baby)
4 cloves Garlic, minced
1/2 cup White Wine or vermouth
1/2 cup Heavy Cream
2 ea Egg Yolks
Salt and pepper to taste
Gnocchi for 2
Heat a heavy saute pan and add the bacon
Cook till browned and cripsy
Add the minced garlic and spinach, and saute till spinach wilts
Add the White wine and reduce by half
Add the heavy cream, and cook on high until sauce coats the back of a spoon, about 10 minutes
Season to taste
Temper the egg yolks with the hot sauce, and then gradually combine the yolk mixture and bacon spinach cream sauce
Toss with freshly cooked gnocchi
First, there was a tea party with the girls up in San Francisco, and I'm not sure how other people do tea, but we do it with lamb riblets, a cheese selection, and Chef Laura's all-time famous scones. I'm not sure where the tea was at tea, but there was some pretty good wine!
Not to mention Easter, where I contributed with an unforgettable marinade of green onion and fennel for the roasted lamb, and my signature Mediterranean quinoa salad with sundried tomatoes, green onion, squash, feta and a host of other delicious stuff.
Where would we be without contributions to the pasta book? New pasta creations include an Applewood smoked bacon and peas cappellini with poached eggs, a creamy Vegetarian peas and spinach risotto (c'mon, risotto falls under the the pasta category too), Gnocchi with bacon and spinach carbonara style (recipe below), and a special treat of red Italian sausage penne, where I didn't have to cook at all (Yes, I am still adding it to the book and claiming credit)!
A special friend came in from Portland, and I tried my best to align the menu with their health conscious goals. You can't have a special dinner without an appetizer or dessert, so a tomato and roasted garlic soup served up with some crunchy bread and creme brulee were a prelude and postlude to the entree of delicious slow roasted salmon, spicy corn salad, and a chile verde sauce.
Speaking of chile verde, Gigya had a chile competition to celebrate our Q1 close, and instead of Texas chile, I spiced it up with my contribution of oxtail chile verde, served up with some queso fresco, sour cream and corn bread, and I won!
More to come I'm sure - the rest of Spring awaits!
Carbonara Gnocchi
Serves 2
4 oz Bacon, diced
3 cups Spinach (anything except baby)
4 cloves Garlic, minced
1/2 cup White Wine or vermouth
1/2 cup Heavy Cream
2 ea Egg Yolks
Salt and pepper to taste
Gnocchi for 2
Heat a heavy saute pan and add the bacon
Cook till browned and cripsy
Add the minced garlic and spinach, and saute till spinach wilts
Add the White wine and reduce by half
Add the heavy cream, and cook on high until sauce coats the back of a spoon, about 10 minutes
Season to taste
Temper the egg yolks with the hot sauce, and then gradually combine the yolk mixture and bacon spinach cream sauce
Toss with freshly cooked gnocchi
Tuesday, February 9, 2010
Potstickers for Pasta?
With Chinese New Year round the corner, I've started the time consuming effort of making Jiao Zi (Chinese Dumplings) way in advance. I'm also taking a break from pasta recipes (although, dumplings are sort of like a pasta right? Aren't raviolis the same thing, just a different shape?) so a post on dumplings seem to be in quite good order.
I started learning to make them when I was in living in England - a northern Chinese girl taught me. She did not know how to cook, but knew how to make dumplings since it was tradition in her family! The hardest part of it is making the skin, and pinching the ends together to form an ingot looking pouch. Getting the dough right is much like making pasta. You learn it right once, and you know it forever. It's very simply, a combination of flour, water, salt, and a bit of oil. I know some versions add egg, but I tend to stay away from it.

My little creations - ingot pouch dumpling for good luck on CNY!
To get it nice and thin, I usually suck it up and use a rolling pin, however, I'm sure you can use a pasta roller which will work just as well. These days, unless there's a very good reason to make the skin by hand, I'm picking it up from the Chinese Market for $1.39 - I would say the opportunity cost is worth it.
The fillings vary, but traditionally, the ingredients are: Pork, Dried Shrimp, Chives, Dried Mushrooms, Napa Cabbage & Ginger, seasoned with sesame oil, salt, and white pepper. The trick to getting the filling to just the right tasty-ness is to fry up a small ball of the filling, taste it then adjust for seasonings before stuffing the dumplings!. It seems so simple, but many people skip this step, and then wonder why their dumplings were not salty enough, or too sweet, etc etc.
This year, I'm having dinner with some folks that don't eat pork, so I had to make a chicken dumpling in addition to the regular ones, and I thought I'd share this one with you. Plus, I have a feeling most of my readers are lazy cooks like me, and don't really relish chopping everything into tiny bits that have to be of equal size, and the chicken dumplings have significantly less ingredients.
You also don't have to pleat the dumplings for this - simply sealing the skin with some warm water will do, but try to make sure that all the air pockets are expelled! To cook, boil, or do it pot stick style - brown the dumplings in a non-stick pan, then add 1/2 cup water, cover, and steam until fillling is cooked through. Now look, if you're absolutely "gian" to learn how to pleat, go here.
Here's the recipe for Chicken Jiao Zi
Makes about 20 dumplings
1 ea Chicken Breast, large (about 1/2 lb)
2 stalks Green Chives, Minced
4 stalks Yellow Chives, Minced
1 Tbs Minced Ginger
2 ea Dried Chinese Mushrooms, reconstituted, and minced
2 Tsp Sesame Oil
1 tsp Cornstarch
20 ea Dumpling Skins (for Potstickers or Gyoza)
Salt & White Pepper to Taste
1. Combine all the ingredients together, except for the dumpling skins
2. Season with salt and pepper
3. Fry up a small ball of the filling and adjust seasoning accordingly
4. Press a teaspoon full of filling into the center of a dumpling skin
5. Using your finger, wet the edges of the dumpling skin, and fold over the meat to seal
6. Store in the fridge, or freeze to keep for about 1 month
7. To cook, boil until dumplings float, or pan-fry in a little oil, add 1/2 cup water, cover, to steam
I started learning to make them when I was in living in England - a northern Chinese girl taught me. She did not know how to cook, but knew how to make dumplings since it was tradition in her family! The hardest part of it is making the skin, and pinching the ends together to form an ingot looking pouch. Getting the dough right is much like making pasta. You learn it right once, and you know it forever. It's very simply, a combination of flour, water, salt, and a bit of oil. I know some versions add egg, but I tend to stay away from it.
My little creations - ingot pouch dumpling for good luck on CNY!
To get it nice and thin, I usually suck it up and use a rolling pin, however, I'm sure you can use a pasta roller which will work just as well. These days, unless there's a very good reason to make the skin by hand, I'm picking it up from the Chinese Market for $1.39 - I would say the opportunity cost is worth it.
The fillings vary, but traditionally, the ingredients are: Pork, Dried Shrimp, Chives, Dried Mushrooms, Napa Cabbage & Ginger, seasoned with sesame oil, salt, and white pepper. The trick to getting the filling to just the right tasty-ness is to fry up a small ball of the filling, taste it then adjust for seasonings before stuffing the dumplings!. It seems so simple, but many people skip this step, and then wonder why their dumplings were not salty enough, or too sweet, etc etc.
This year, I'm having dinner with some folks that don't eat pork, so I had to make a chicken dumpling in addition to the regular ones, and I thought I'd share this one with you. Plus, I have a feeling most of my readers are lazy cooks like me, and don't really relish chopping everything into tiny bits that have to be of equal size, and the chicken dumplings have significantly less ingredients.
You also don't have to pleat the dumplings for this - simply sealing the skin with some warm water will do, but try to make sure that all the air pockets are expelled! To cook, boil, or do it pot stick style - brown the dumplings in a non-stick pan, then add 1/2 cup water, cover, and steam until fillling is cooked through. Now look, if you're absolutely "gian" to learn how to pleat, go here.
Here's the recipe for Chicken Jiao Zi
Makes about 20 dumplings
1 ea Chicken Breast, large (about 1/2 lb)
2 stalks Green Chives, Minced
4 stalks Yellow Chives, Minced
1 Tbs Minced Ginger
2 ea Dried Chinese Mushrooms, reconstituted, and minced
2 Tsp Sesame Oil
1 tsp Cornstarch
20 ea Dumpling Skins (for Potstickers or Gyoza)
Salt & White Pepper to Taste
1. Combine all the ingredients together, except for the dumpling skins
2. Season with salt and pepper
3. Fry up a small ball of the filling and adjust seasoning accordingly
4. Press a teaspoon full of filling into the center of a dumpling skin
5. Using your finger, wet the edges of the dumpling skin, and fold over the meat to seal
6. Store in the fridge, or freeze to keep for about 1 month
7. To cook, boil until dumplings float, or pan-fry in a little oil, add 1/2 cup water, cover, to steam
Monday, January 25, 2010
Funghi Faux Food
I've been going veg about 3-4 times a week these days - seeing as I don't eat lunch either, a veg dinner usually comes in the form of pasta, since it's substantially heavier, and oh well, I am on a mission to complete 101 ways with it!
One of my favorite kitchen staples are dried exotic mushrooms, because they go a really long way. The re-hydrated liquid that they soak in also has tons of flavor, and can add to a pasta sauce, soup, or risotto very well.
The trick to cooking dried mushrooms is this - first, use very hot water so it doesn't take forever and a day to rehydrate. Next, once the mushrooms are hydrated, give it a really good squeeze to get rid of excess liquid.
(I know, sounds ironic right? First they are dried, then you add liquid, and now you want to remove the liquid... Make up your mind already!)
Then, before using the mushroom liquid, strain it to remove any fine grit and dirt that tend to be prevalent in dried mushrooms.
I usually end up stir frying (which is why they have to be fairly dry) the mushrooms because when your brown them, it caramelizes and brings out this really delicious flavor. To stir fry them, just heat a little oil, and throw in some garlic, then add the mushrooms, and resist stirring so parts of the mushroom bits can get nicely browned.
So anyway, back to this pasta dish - it rips off the flavor from browning mushrooms, and then adds green goodness with the spinach and peas. It's pretty tasty - check it out. If you want to go on the lighter side of things, skip the heavy cream, and reduce a cup of white wine instead!

Wild Mushroom & Spinach Capellini
Serves 2
2 oz Dried Wild Mushroom Mix
12 oz Bloomsdale Spinach, or other thick stemmed spinach. Don't use Baby Spinach or Chinese Spinach
1 cup Fresh or Frozen Peas
6 ea Garlic Cloves, sliced
4 Tbs Olive Oil
0.5 cup Heavy Cream
1 cup Grated Hard Cheese, like Parmesan
2 Tbs Parsley, Minced
2 servings Capellini or other noodle pasta, cooked according to instructions
Salt & pepper to taste
1 Soak the dried mushrooms in 1 cup of very hot water for about 15 minutes
2 Hang squeeze water from soaked mushrooms and reserve mushroom liquid
3 Heat 2 tbs olive oil in saute pan, then throw in garlic and cook for about 30 seconds until garlic is lightly browned
4 Add the mushrooms to the pan and quickly saute until edges turn light brown
5 Add the spinach and the remaining olive oil, and saute until spinach starts to wilt
6 Add the reserved mushroom liquid and the heavy cream, and reduce until sauce starts to coat the back of a spoon
7 Add the peas and and cover pan until peas are just cooked, about 1 minute
8 Season pasta sauce accordingly, then toss noodles, cheese, and parsley well
9 Serve immediately
One of my favorite kitchen staples are dried exotic mushrooms, because they go a really long way. The re-hydrated liquid that they soak in also has tons of flavor, and can add to a pasta sauce, soup, or risotto very well.
The trick to cooking dried mushrooms is this - first, use very hot water so it doesn't take forever and a day to rehydrate. Next, once the mushrooms are hydrated, give it a really good squeeze to get rid of excess liquid.
(I know, sounds ironic right? First they are dried, then you add liquid, and now you want to remove the liquid... Make up your mind already!)
Then, before using the mushroom liquid, strain it to remove any fine grit and dirt that tend to be prevalent in dried mushrooms.
I usually end up stir frying (which is why they have to be fairly dry) the mushrooms because when your brown them, it caramelizes and brings out this really delicious flavor. To stir fry them, just heat a little oil, and throw in some garlic, then add the mushrooms, and resist stirring so parts of the mushroom bits can get nicely browned.
So anyway, back to this pasta dish - it rips off the flavor from browning mushrooms, and then adds green goodness with the spinach and peas. It's pretty tasty - check it out. If you want to go on the lighter side of things, skip the heavy cream, and reduce a cup of white wine instead!
Wild Mushroom & Spinach Capellini
Serves 2
2 oz Dried Wild Mushroom Mix
12 oz Bloomsdale Spinach, or other thick stemmed spinach. Don't use Baby Spinach or Chinese Spinach
1 cup Fresh or Frozen Peas
6 ea Garlic Cloves, sliced
4 Tbs Olive Oil
0.5 cup Heavy Cream
1 cup Grated Hard Cheese, like Parmesan
2 Tbs Parsley, Minced
2 servings Capellini or other noodle pasta, cooked according to instructions
Salt & pepper to taste
1 Soak the dried mushrooms in 1 cup of very hot water for about 15 minutes
2 Hang squeeze water from soaked mushrooms and reserve mushroom liquid
3 Heat 2 tbs olive oil in saute pan, then throw in garlic and cook for about 30 seconds until garlic is lightly browned
4 Add the mushrooms to the pan and quickly saute until edges turn light brown
5 Add the spinach and the remaining olive oil, and saute until spinach starts to wilt
6 Add the reserved mushroom liquid and the heavy cream, and reduce until sauce starts to coat the back of a spoon
7 Add the peas and and cover pan until peas are just cooked, about 1 minute
8 Season pasta sauce accordingly, then toss noodles, cheese, and parsley well
9 Serve immediately
Sunday, December 20, 2009
Know Good Gnocchi
I had a couple of friends over for dinner on Saturday, and in keeping with the pasta craze, I served up an awesome potato gnocchi gratin.
Cooking with gnocchi frustrates me - for most of my life, I could only ever use gnocchi if and only if I made it myself (kind of like the same gripe I have with make carbonara from dried pasta). And, of course, Gnocchi is such a pain to make, I don't ever want to bother with it.
Trader Joe's saved me quite recently though - now that they have one open at Town & Country, I've spent hours perusing through the aisles and shelves, and have found the perfect packaged gnocchi. It's imported from Italy, fresh, vacuum sealed, not doughy or chewy, and overall, just made quite well! On a funnier note, that one day I stopped at TJ's to buy a bottle of rum, I forgot my ID, got carded, and was refused the purchase. Well, if I were them, I would card me too.
Anyway, I decided that since I seldom make my own pasta anyway, why should gnocchi have a different standard anyway? So, I caved into buying one (two actually) of those TJ gnocchi packs.
I had some Cambazola (a triple cream blue cheese) in the fridge, and wanted to use it in the sauce, but thought that a blue cheese gnocchi would just be too boring. After all, they sell the same stuff in the frozen section at TJ's already! The perfect winter sauce for me is always a brown butter, and I didn't get to make any brown butter pastas this fall, so I thought it would be a perfect incorporation into this dish! And, you can't have brown butter without having sage - it's a classic pairing!
In the end, the sauce was a simple bechamel, laced with sage brown butter, and then spiced with cambazola for a the final kick! I stuck the whole gratin in the oven till the sauce started bubbling and the top got all crusty, and there we had the perfect winter side dish!

Here's the recipe:
Gnocchi Au Gratin with Sage Brown Butter & Blue Cheese
Serves 4
20 ea Sage leaves
8 Tbs Butter
4 cloves Garlic, Minced
1 Lb Spinach
2 Tbs Flour
2 cups Milk
1 tsp Nutmeg, ground
0.5 cup Creamy blue cheese, like cambazola or gorgonzola
0.5 cup Bread crumbs
2 Tbs Oil
Salt to Taste
4 Servings Gnocchi, cooked
1 Melt the butter in a small sauce pan, until bubbling and just turning brown
2 Add the sage leaves and fry until crispy, remove with a slotted spoon and blot on paper towels. Salt
3 Remove 2 tablespoons of browned butter into a saucepan, and throw in the garlic and spinach
4 Saute until spinach cooks down and then remove from heat to reserve
5 Add the flour to the remaining browned butter and cook over low heat, whisking constantly
6 Once flour is cooked through (about 5 minutes), add the milk and whisk until sauce is smooth
7 Add the nutmeg, and season the salt, under-salting to compensate for the cheese
8 Cook the sauce for another 5-10 minutes, then remove from heat and stir in the cheese until everything is smooth
9 Crumble the fried sage leaves, and mix together with the breadcrumbs and oil
10 In an oven proof dish, toss the Gnocchi, blue cheese sauce and spinach together.
11 Top with generous sprinkles of sage breadcrumbs
12 Bake in the oven at 350F until top is browned and sauce is bubbling, about 20 minutes
Cooking with gnocchi frustrates me - for most of my life, I could only ever use gnocchi if and only if I made it myself (kind of like the same gripe I have with make carbonara from dried pasta). And, of course, Gnocchi is such a pain to make, I don't ever want to bother with it.
Trader Joe's saved me quite recently though - now that they have one open at Town & Country, I've spent hours perusing through the aisles and shelves, and have found the perfect packaged gnocchi. It's imported from Italy, fresh, vacuum sealed, not doughy or chewy, and overall, just made quite well! On a funnier note, that one day I stopped at TJ's to buy a bottle of rum, I forgot my ID, got carded, and was refused the purchase. Well, if I were them, I would card me too.
Anyway, I decided that since I seldom make my own pasta anyway, why should gnocchi have a different standard anyway? So, I caved into buying one (two actually) of those TJ gnocchi packs.
I had some Cambazola (a triple cream blue cheese) in the fridge, and wanted to use it in the sauce, but thought that a blue cheese gnocchi would just be too boring. After all, they sell the same stuff in the frozen section at TJ's already! The perfect winter sauce for me is always a brown butter, and I didn't get to make any brown butter pastas this fall, so I thought it would be a perfect incorporation into this dish! And, you can't have brown butter without having sage - it's a classic pairing!
In the end, the sauce was a simple bechamel, laced with sage brown butter, and then spiced with cambazola for a the final kick! I stuck the whole gratin in the oven till the sauce started bubbling and the top got all crusty, and there we had the perfect winter side dish!
Here's the recipe:
Gnocchi Au Gratin with Sage Brown Butter & Blue Cheese
Serves 4
20 ea Sage leaves
8 Tbs Butter
4 cloves Garlic, Minced
1 Lb Spinach
2 Tbs Flour
2 cups Milk
1 tsp Nutmeg, ground
0.5 cup Creamy blue cheese, like cambazola or gorgonzola
0.5 cup Bread crumbs
2 Tbs Oil
Salt to Taste
4 Servings Gnocchi, cooked
1 Melt the butter in a small sauce pan, until bubbling and just turning brown
2 Add the sage leaves and fry until crispy, remove with a slotted spoon and blot on paper towels. Salt
3 Remove 2 tablespoons of browned butter into a saucepan, and throw in the garlic and spinach
4 Saute until spinach cooks down and then remove from heat to reserve
5 Add the flour to the remaining browned butter and cook over low heat, whisking constantly
6 Once flour is cooked through (about 5 minutes), add the milk and whisk until sauce is smooth
7 Add the nutmeg, and season the salt, under-salting to compensate for the cheese
8 Cook the sauce for another 5-10 minutes, then remove from heat and stir in the cheese until everything is smooth
9 Crumble the fried sage leaves, and mix together with the breadcrumbs and oil
10 In an oven proof dish, toss the Gnocchi, blue cheese sauce and spinach together.
11 Top with generous sprinkles of sage breadcrumbs
12 Bake in the oven at 350F until top is browned and sauce is bubbling, about 20 minutes
Friday, December 4, 2009
Vongole on Steroids!
Following my attempt towards the 101 ways with Pasta, I stopped for clams and pappardelle at the market before heading home one evening. Unfortunately, it turned out that the pappa was not the right noodle for the dish, but it was a very good dish nonetheless. A thicker, rounder pasta like spaghetti or linguine would probably have worked out better, because thin pastas like pappa tend to absorb all the sauce. With a thin sauce like this one, you don't want to dry the dish out.
I usually go all out with my staple white wine & clam juice base plus a bunch of other stuff (recipe here), but I wanted this pasta to be ready in 20 minutes, and just plainly delicious. I could have gone with the classic vongole, but with the pancetta in my fridge, I thought I would just kick it up a notch, (as well as saving it from going bad)! Plus, I also made a quick green pea soup, and thought that a sprinkling of pancetta would go very well!
The result? And overwhelming medley of flavor - this is one dish that does not go by the nickname "Bland"! Because it's such a bold pasta with plenty of layers, this is not the clam pasta that goes with a crisp white wine! Serve with a nice pale ale, and all will be well!

Vongole on Steroids
5 cloves Garlic, thinly slices
2 oz Pancetta, diced
1 Tbs Olive Oil
1 cup Crisp white wine, like a Sauvignon blanc, Riesling, Pinot Gris, (no chardonnay)
1 cup Chicken Stock
1/5 Lbs Clams, fresh
4 oz Baby Spinach Leaves
2 Tbs Butter, Cold
2 Tbs Parsley, Minced
2 ea Anchovy fillets, mashed
1/3 cup Grated hard cheese
Cooked Noodle Pasta for two - Linguine, Fettucine or Spaghetti works well
1. Heat the olive oil in a large heavy bottomed saute pan
2. Add the diced pancetta, and cook till nicely browned. Remove from pan and reserve
3. Add the garlic slivers to the pancetta drippings and saute until just cooked, but not browned
4. Add the White wine and Chicken stock, and bring to a boil
5. Reduce white wine mixture until about 1/3 cup
4. Add the clams and spinach to the liquid, and cover
5. Steam clams for about 5-7 minutes, or until the open up
6. Take the saute pan off the heat, and swirl in the cold butter, parsley and anchovies
7. Toss with pasta and cheese
8. Garnish with browned pancetta and serve immediately
I usually go all out with my staple white wine & clam juice base plus a bunch of other stuff (recipe here), but I wanted this pasta to be ready in 20 minutes, and just plainly delicious. I could have gone with the classic vongole, but with the pancetta in my fridge, I thought I would just kick it up a notch, (as well as saving it from going bad)! Plus, I also made a quick green pea soup, and thought that a sprinkling of pancetta would go very well!
The result? And overwhelming medley of flavor - this is one dish that does not go by the nickname "Bland"! Because it's such a bold pasta with plenty of layers, this is not the clam pasta that goes with a crisp white wine! Serve with a nice pale ale, and all will be well!
Vongole on Steroids
5 cloves Garlic, thinly slices
2 oz Pancetta, diced
1 Tbs Olive Oil
1 cup Crisp white wine, like a Sauvignon blanc, Riesling, Pinot Gris, (no chardonnay)
1 cup Chicken Stock
1/5 Lbs Clams, fresh
4 oz Baby Spinach Leaves
2 Tbs Butter, Cold
2 Tbs Parsley, Minced
2 ea Anchovy fillets, mashed
1/3 cup Grated hard cheese
Cooked Noodle Pasta for two - Linguine, Fettucine or Spaghetti works well
1. Heat the olive oil in a large heavy bottomed saute pan
2. Add the diced pancetta, and cook till nicely browned. Remove from pan and reserve
3. Add the garlic slivers to the pancetta drippings and saute until just cooked, but not browned
4. Add the White wine and Chicken stock, and bring to a boil
5. Reduce white wine mixture until about 1/3 cup
4. Add the clams and spinach to the liquid, and cover
5. Steam clams for about 5-7 minutes, or until the open up
6. Take the saute pan off the heat, and swirl in the cold butter, parsley and anchovies
7. Toss with pasta and cheese
8. Garnish with browned pancetta and serve immediately
Wednesday, November 25, 2009
Something Old, Something New
I'm on a pasta roll for sure.
Once of the best things about pasta is that you can toss it up with almost anything, and sometimes the best combinations are those that were "chapalang" thrown together from anything and everything in the fridge.
It's a great way to use leftovers too. I had to fix dinner quite quickly with just a stark supply of food, and came up with the following: Spinach, Cheese (Always have this in your fridge please), Garlic (this too), Anchovies, Fresh Fettucine, and Frozen Chicken
So my thoughts as follows: "hmm... all the necessary ingredients for Aglio Olio, except without the pepper flakes & pasta - but definitely some good flavor going on there with the garlic & anchovies." *Ding Ding! Eureka!
It was an easy decision - saute the spinach in the garlic and toss everything together like an Aglio Olio - then serve it with roast chicken, and it's a complete meal with the protein, carbs & veg! Turned out fantastic (why am I not surprised) so here's the recipe.
I've been having thoughts of publishing a book about 101 ways with pasta - what do you think? Am I up for the challenge?

Updated Aglio Olio
1 Bag Baby Spinach leaves
6 cloves Garlic, sliced thin
3 Tbs Good Quality Extra Virgin Olive Oil
5 ea Anchovy Fillets, chopped fine
1/2 cup Grated Parmesan Cheese
Noodle Pasta for 2
1. Cook the pasta and well salted boiling water, and drain well
2. Meanwhile, heat 2 Tbs of olive in a saute pan
3. Gently cook the garlic slivers until they are slight translucent, but not brown
4. Add the spinach and cook to wilt
5. Toss the sauteed spinach and garlic with the anchovies, pasta, cheese and remaining olive oil
6. Serve immediately
Once of the best things about pasta is that you can toss it up with almost anything, and sometimes the best combinations are those that were "chapalang" thrown together from anything and everything in the fridge.
It's a great way to use leftovers too. I had to fix dinner quite quickly with just a stark supply of food, and came up with the following: Spinach, Cheese (Always have this in your fridge please), Garlic (this too), Anchovies, Fresh Fettucine, and Frozen Chicken
So my thoughts as follows: "hmm... all the necessary ingredients for Aglio Olio, except without the pepper flakes & pasta - but definitely some good flavor going on there with the garlic & anchovies." *Ding Ding! Eureka!
It was an easy decision - saute the spinach in the garlic and toss everything together like an Aglio Olio - then serve it with roast chicken, and it's a complete meal with the protein, carbs & veg! Turned out fantastic (why am I not surprised) so here's the recipe.
I've been having thoughts of publishing a book about 101 ways with pasta - what do you think? Am I up for the challenge?
Updated Aglio Olio
1 Bag Baby Spinach leaves
6 cloves Garlic, sliced thin
3 Tbs Good Quality Extra Virgin Olive Oil
5 ea Anchovy Fillets, chopped fine
1/2 cup Grated Parmesan Cheese
Noodle Pasta for 2
1. Cook the pasta and well salted boiling water, and drain well
2. Meanwhile, heat 2 Tbs of olive in a saute pan
3. Gently cook the garlic slivers until they are slight translucent, but not brown
4. Add the spinach and cook to wilt
5. Toss the sauteed spinach and garlic with the anchovies, pasta, cheese and remaining olive oil
6. Serve immediately
Wednesday, November 18, 2009
Pretty Perfect Pancetta-Pea Pasta!
I had a craving for pancetta and peas (per my tweet about a week ago), and by chance had fallen upon some lovely pancetta from AG Ferrari!
It took me only 20 minutes to throw this together, and I think it qualifies as one of my signature pasta dishes now, along with Seafood & Carbonara, which has never failed to win praises :D
The traditional recipe isn't creamy like this, but I was in the mood for some comfort food, which in my mind equates to added lux (as in, more fat) - hence the addition of cream, & egg yolk.
The very last steps of the recipe are almost like a carbonara. Although there are not as many egg yolks, you will need to make sure that the pasta is hot enough to cook the yolks, but the sauce is not hot enough to curdle the yolks. To do this right, don't skip the tempering step (step 7), which heats the yolks slightly, so it doesn't shock when tossed with the pasta or sauce.
Also, I would recommend tossing the pasta with the sauce first, then pouring the yolk mixture over and re-tossing with parm.
You could use any kind of pasta, but I chose conchiglie (shells), because the bits of peas and pancetta fit nicely into their pockets. You can also substitute bacon for pancetta, but COME ON!
Enjoy!
Pancetta & Peas Pasta Recipe
1 cup Frozen Peas
4 oz Pancetta, diced
1/4 ea Yellow onion, brunoise
1 cup Chicken Stock
1 cup Heavy Cream
3 ea Egg Yolks
1/2 cup Parmesan Cheese, grated
Pasta shells for two
1. Bring a pot of salted water to boil and cook pasta to al dente
2. Heat a heavy saucepan and fry the pancetta until crisp on the outside
3. Remove pancetta from pan and reserve
4. In rendered pancetta fat, add the yellow onion and saute till lightly browned and translucent
5. Add the heavy cream and chicken stock and bring to a boil
6. Reduce sauce until about 1/3 cup
7. Whisk the egg yolks until thick in a separate bowl and add 2 tablespoons of the reduced sauce, quickly whisking to prevent curdling
8. Add frozen peas to the cream sauce and cover until liquid comes to a boil again
9. Add the reserved pancetta and toss pasta into the saucepan coating with cream sauce
10. Add egg yolk mixture and cheese and toss until sauce thickens
11. Serve immediately

It took me only 20 minutes to throw this together, and I think it qualifies as one of my signature pasta dishes now, along with Seafood & Carbonara, which has never failed to win praises :D
The traditional recipe isn't creamy like this, but I was in the mood for some comfort food, which in my mind equates to added lux (as in, more fat) - hence the addition of cream, & egg yolk.
The very last steps of the recipe are almost like a carbonara. Although there are not as many egg yolks, you will need to make sure that the pasta is hot enough to cook the yolks, but the sauce is not hot enough to curdle the yolks. To do this right, don't skip the tempering step (step 7), which heats the yolks slightly, so it doesn't shock when tossed with the pasta or sauce.
Also, I would recommend tossing the pasta with the sauce first, then pouring the yolk mixture over and re-tossing with parm.
You could use any kind of pasta, but I chose conchiglie (shells), because the bits of peas and pancetta fit nicely into their pockets. You can also substitute bacon for pancetta, but COME ON!
Enjoy!
Pancetta & Peas Pasta Recipe
1 cup Frozen Peas
4 oz Pancetta, diced
1/4 ea Yellow onion, brunoise
1 cup Chicken Stock
1 cup Heavy Cream
3 ea Egg Yolks
1/2 cup Parmesan Cheese, grated
Pasta shells for two
1. Bring a pot of salted water to boil and cook pasta to al dente
2. Heat a heavy saucepan and fry the pancetta until crisp on the outside
3. Remove pancetta from pan and reserve
4. In rendered pancetta fat, add the yellow onion and saute till lightly browned and translucent
5. Add the heavy cream and chicken stock and bring to a boil
6. Reduce sauce until about 1/3 cup
7. Whisk the egg yolks until thick in a separate bowl and add 2 tablespoons of the reduced sauce, quickly whisking to prevent curdling
8. Add frozen peas to the cream sauce and cover until liquid comes to a boil again
9. Add the reserved pancetta and toss pasta into the saucepan coating with cream sauce
10. Add egg yolk mixture and cheese and toss until sauce thickens
11. Serve immediately
Friday, October 16, 2009
When life gives you vodka, make a sauce!
Every good cook needs to be able to make a good tomato based meat sauce. It's the base of many dishes - spaghetti, lasagna, chili, and even meat loaf, so the classic recipe needs to be extremely easy to put together, and made with ingredients that are always within pantry reach.
I've made numerous changes to the recipe over the years (check this one out from last year here), but the recipe will always have the following ingredients: A beef & pork mix (pork for texture and flavor), tomatoes (canned when you are in a pinch), tomato paste (not always bad for you), onions. The secret ingredient is always an alcohol, and I think this recipe tops the lot with the alcohol of choice - Vodka!
Here's the recipe!
Vodka Meat Ragu
2 lbs Pork & Beef, Hand Ground
1 lbs Mixed Tomatoes,diced, preferably Roma, cherry, sweet 100s
1 ea Carrot, Brunoise
1 ea Celery, Brunoise
1/4 ea Onion, Bruinoise
1 cup Vodka
2 tbs Tomato Paste
2 tbs Fresh Herb, minced - parsley, oregano, basil & thyme recommended
4 tbs Olive Oil
Salt, pepper & sugar to taste
1. Heat the oil in a heavy saute pan & brown meat, working in batches if necessary
2. Removed meat into a saucepot and add the tomato paste and cook for an additional 2 minutes
3. Add the tomatoes to the saucepot and leave to simmer
4. In the browned saute pan, add the onions to brown lightly, adding a little more oil if necessary
5. Add the carrots and celery and saute, then add the vodka to deglaze the pan, scraping up the brown bits
6. Keep the vodka mixture boiling until all the alcohol burns off - be careful, vapor might ignite, but it's nothing to worry about
7. Add the vodka liquid and vegtables into the saucepot with the meat, stir in the minced herb
8. Simmer until tomatoes cook down and sauce has a thick consistency
9. Season to taste with salt, pepper & sugar
Leave to cool, and best served after the sauce is left to sit for about 2 days in the fridge
I've made numerous changes to the recipe over the years (check this one out from last year here), but the recipe will always have the following ingredients: A beef & pork mix (pork for texture and flavor), tomatoes (canned when you are in a pinch), tomato paste (not always bad for you), onions. The secret ingredient is always an alcohol, and I think this recipe tops the lot with the alcohol of choice - Vodka!
Here's the recipe!
Vodka Meat Ragu
2 lbs Pork & Beef, Hand Ground
1 lbs Mixed Tomatoes,diced, preferably Roma, cherry, sweet 100s
1 ea Carrot, Brunoise
1 ea Celery, Brunoise
1/4 ea Onion, Bruinoise
1 cup Vodka
2 tbs Tomato Paste
2 tbs Fresh Herb, minced - parsley, oregano, basil & thyme recommended
4 tbs Olive Oil
Salt, pepper & sugar to taste
1. Heat the oil in a heavy saute pan & brown meat, working in batches if necessary
2. Removed meat into a saucepot and add the tomato paste and cook for an additional 2 minutes
3. Add the tomatoes to the saucepot and leave to simmer
4. In the browned saute pan, add the onions to brown lightly, adding a little more oil if necessary
5. Add the carrots and celery and saute, then add the vodka to deglaze the pan, scraping up the brown bits
6. Keep the vodka mixture boiling until all the alcohol burns off - be careful, vapor might ignite, but it's nothing to worry about
7. Add the vodka liquid and vegtables into the saucepot with the meat, stir in the minced herb
8. Simmer until tomatoes cook down and sauce has a thick consistency
9. Season to taste with salt, pepper & sugar
Leave to cool, and best served after the sauce is left to sit for about 2 days in the fridge
Tuesday, July 21, 2009
A Carbonara Indulgence
I had a ton of Mentaiko Mayo leftover from the July 3rd BBQ, and since you can't keep mentaiko or fresh mayo, I decided to whip up maybe one of the most delicious/unique Carbonara dishes I've ever had - Mentaiko Carbonara with Lobster, Spinach and Fermented Uni!
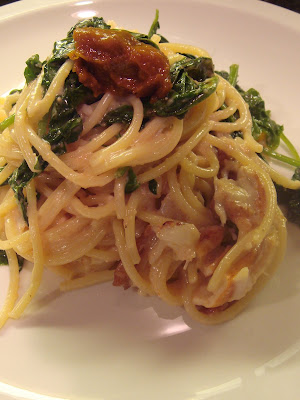
Traditionally, mayonnaise is made by slowly whisking in a drizzle of oil into egg yolks until an emulsion forms. Starting slowly and with a good emulsion will ensure that your mayonnaise doesn't break even when more oil is added later. Homemade Mayonnaise is just the biggest luxury - it also a pain to make, but once you get the hang of it, I guarantee you'll never go back to commercial Mayo if you can help it! The secret to Mayo success is to be very patient, forearm strength, and have a great helper! The higher the oil to egg yolk ratio, the more lux the Mayo will be.
With this version, the kick comes from Mentaiko, which is spicy cured pollack roe from Japan. Mentaiko filled riceballs (Onigiri) are very popular as a filling, and the best Mentaiko Yaki Onigiri I've had is at Tanto, hands down! Try it, keep it, freeze it, or make Mentaiko Carbonara, but whatever it is, to make a good Mentaiko mayo, you've got to start with a good Mayo! It also worked deliciously well with our grilled lobsters at the seafood fest!
Mentaiko Mayo
Makes 2 cups
2 ea Egg Yolks
1 cup Oil, Light Olive, Canola or Grapeseed
4-6 ea Mentaiko sacs, about 1 box
1 ea Lemon, Juiced
2 ea Garlic cloves, crush smooth
2 Tbsp Hot water
Salt & Pepper
1. Whisk the egg yolks in a metal bowl until really thick
2. Very slowly, get another person to drizzle a teensy bit of oil down the side of the bowl
3. Keep whisking to incorporate the oil into your egg yolks
4. Once you start getting a thickened consistency,slowly drizzle the rest of the oil in, while whisking
5. After 20 minutes of whisking and a painful forearm, you should end up with some really nice Mayo
6. Add the garlic cloves, lemon juice and hot water to the Mayo, this should lighten up the color
7. Remove the skin from the Mentaiko sacs, and then whisk in the eggs into the Mayo
8. Season with salt and pepper
If you're lazy and want to use Shelf Mayo, skip steps 1 - 5.
For Mentaiko Carbonara:
2 portions Spaghetti
4 ea Thick sliced bacon
2 cups Baby Spinach
2/3 cups Mentaiko Mayo
Optional ingredients: Picked Lobster or Crab Meat, and Fermented Uni
Bring a pot of salted water to boil and cook pasta
While pasta is cooking, dice and fry up bacon until bits are crispy
Remove bacon bits from pan, and reserve
In the hot pan, wilt the spinach in the bacon drippings
Drain pasta, and while pasta is still very very hot, toss Mentaiko Mayo, Bacon, and Spinach together
If using optional shellfish meat, toss it in as well
Top with Uni
Serve immediately
Traditionally, mayonnaise is made by slowly whisking in a drizzle of oil into egg yolks until an emulsion forms. Starting slowly and with a good emulsion will ensure that your mayonnaise doesn't break even when more oil is added later. Homemade Mayonnaise is just the biggest luxury - it also a pain to make, but once you get the hang of it, I guarantee you'll never go back to commercial Mayo if you can help it! The secret to Mayo success is to be very patient, forearm strength, and have a great helper! The higher the oil to egg yolk ratio, the more lux the Mayo will be.
With this version, the kick comes from Mentaiko, which is spicy cured pollack roe from Japan. Mentaiko filled riceballs (Onigiri) are very popular as a filling, and the best Mentaiko Yaki Onigiri I've had is at Tanto, hands down! Try it, keep it, freeze it, or make Mentaiko Carbonara, but whatever it is, to make a good Mentaiko mayo, you've got to start with a good Mayo! It also worked deliciously well with our grilled lobsters at the seafood fest!
Mentaiko Mayo
Makes 2 cups
2 ea Egg Yolks
1 cup Oil, Light Olive, Canola or Grapeseed
4-6 ea Mentaiko sacs, about 1 box
1 ea Lemon, Juiced
2 ea Garlic cloves, crush smooth
2 Tbsp Hot water
Salt & Pepper
1. Whisk the egg yolks in a metal bowl until really thick
2. Very slowly, get another person to drizzle a teensy bit of oil down the side of the bowl
3. Keep whisking to incorporate the oil into your egg yolks
4. Once you start getting a thickened consistency,slowly drizzle the rest of the oil in, while whisking
5. After 20 minutes of whisking and a painful forearm, you should end up with some really nice Mayo
6. Add the garlic cloves, lemon juice and hot water to the Mayo, this should lighten up the color
7. Remove the skin from the Mentaiko sacs, and then whisk in the eggs into the Mayo
8. Season with salt and pepper
If you're lazy and want to use Shelf Mayo, skip steps 1 - 5.
For Mentaiko Carbonara:
2 portions Spaghetti
4 ea Thick sliced bacon
2 cups Baby Spinach
2/3 cups Mentaiko Mayo
Optional ingredients: Picked Lobster or Crab Meat, and Fermented Uni
Bring a pot of salted water to boil and cook pasta
While pasta is cooking, dice and fry up bacon until bits are crispy
Remove bacon bits from pan, and reserve
In the hot pan, wilt the spinach in the bacon drippings
Drain pasta, and while pasta is still very very hot, toss Mentaiko Mayo, Bacon, and Spinach together
If using optional shellfish meat, toss it in as well
Top with Uni
Serve immediately
Wednesday, March 18, 2009
Tomales Bay Must-Have Steamer Base for Clams
My Mom and little brother, Ed, came to visit recently, and since they both love oysters, we figured that a trip to one of the Oyster Farms at Point Reyes was appropriate.
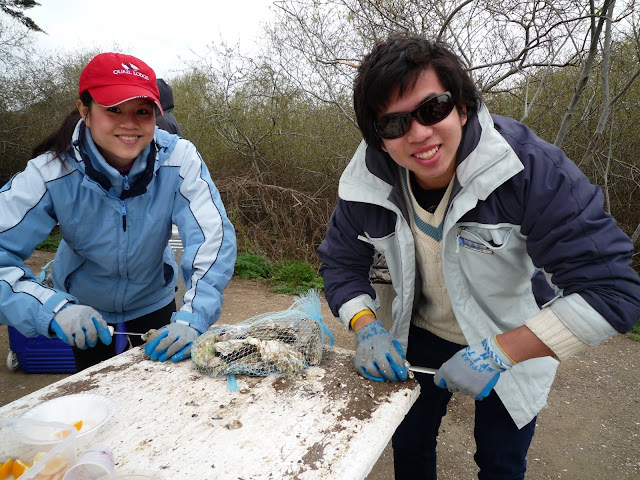
We visited Tomales Bay last time when my friend Darryl came to visit, and were caught completely unaware at the possibilities of what we could do with the fresh catch (Oysters in 5 different sizes, mussels & clams)! This time, we came prepared, with steamer base for the clams, and chowder base for the oysters.

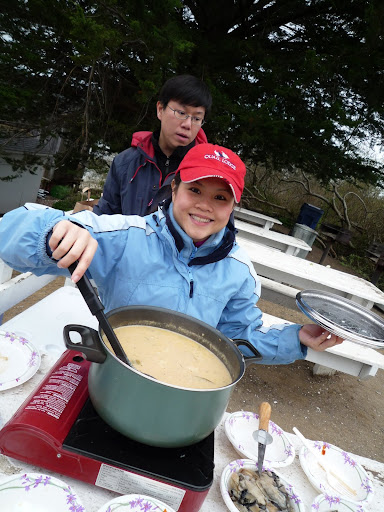
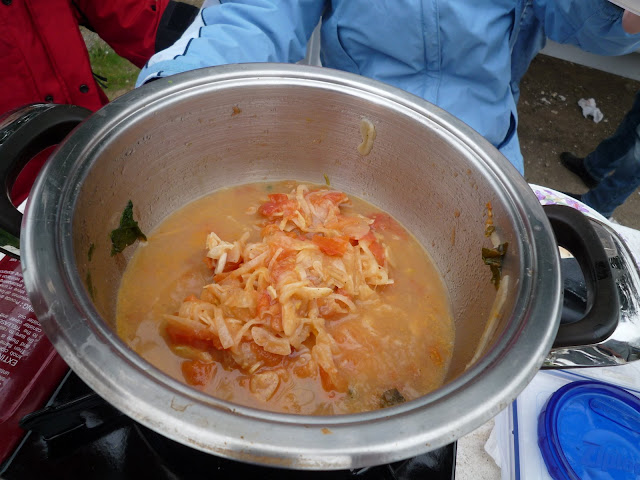
Everything turned out delicious, but the one must have that I'm bringing on all these picnics, is the Steamer Base. While you can BBQ the large oysters, clams are pretty little, and you end up losing a lot of their delicious clam liquor when they open up on the grill.
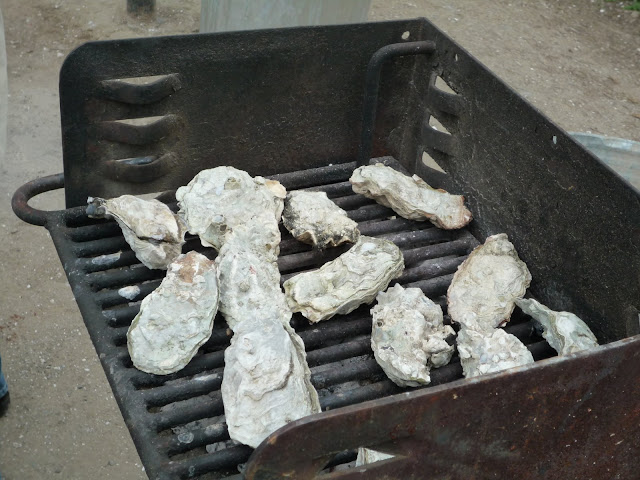

I brought a portable gas stove and a pot for the clams, but if you don't have a stove, you can simply put a pot on the grill, slowly let the clams open up and cook. Yum.
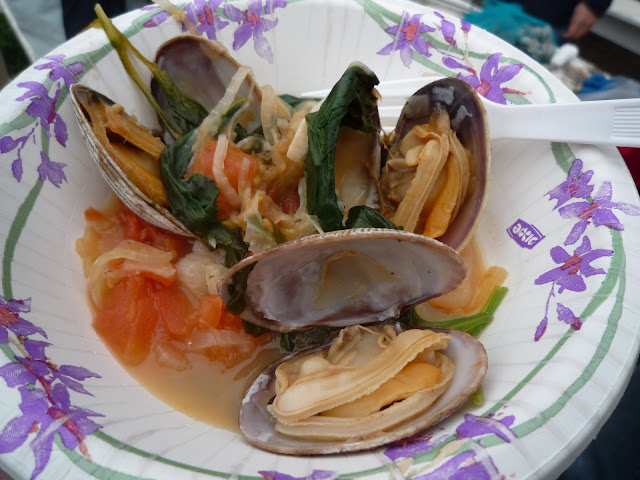
This is also perfect for non-picnic days, as an impressive, elegant appetizer. Toss with spaghetti for a filling main, and I guarantee that folks will be coming back for more.
We visited Tomales Bay last time when my friend Darryl came to visit, and were caught completely unaware at the possibilities of what we could do with the fresh catch (Oysters in 5 different sizes, mussels & clams)! This time, we came prepared, with steamer base for the clams, and chowder base for the oysters.

Everything turned out delicious, but the one must have that I'm bringing on all these picnics, is the Steamer Base. While you can BBQ the large oysters, clams are pretty little, and you end up losing a lot of their delicious clam liquor when they open up on the grill.

I brought a portable gas stove and a pot for the clams, but if you don't have a stove, you can simply put a pot on the grill, slowly let the clams open up and cook. Yum.
This is also perfect for non-picnic days, as an impressive, elegant appetizer. Toss with spaghetti for a filling main, and I guarantee that folks will be coming back for more.
Make the base up to 3 days ahead, or freeze for up to 3 months
Steamed Clams with Fennel and White Wine Broth
Serves 6-8
4 lbs Manila Clams
12 oz bag Baby Spinach
1 batch Steamer Base, Recipe below
Bring the steamer to a boil in a large pot
Add the clams and spinach
Cover pot, and lower heat to simmer
After 8 minutes, check to see that most clams have opened, if not, cover and check again in 5 minutes
Discard any clams that are unopened
Garnish with parsley and serve immediately
For a main course, toss with 1 lb of cooked spaghetti
Steamer Base
1/2 ea Yellow Onion, thinly sliced into half moons
1 ea Leek, white part only, thinly sliced
1 ea Fennel Bulb, thinly sliced - I used a mandolin for this
5 ea Garlic Cloves, thinly sliced
2 tbsp Olive Oil
1 bottle Crisp White Wine, Sauvignon Blanc, Pinot Grigio, or Riesling will work
1 cup Clam Juice or Chicken Broth
3 ea Roma Tomatoes, diced
1 sprig Thyme
1 ea Bay Leaf
5 ea Pepper Corns
2 tbsp Parsley, chopped to garnish
Heat the oil in a large saucepan
Add the onions and leeks, and saute until translucent
Add the garlic and fennel, and saute for 1 more minute
Add the rest of the ingredients, and bring to a boil
Turn to to a simmer, and cook until liquid has mostly boiled off, but vegetables are still moist
Cool and chill for later use
Subscribe to:
Posts (Atom)