Showing posts with label Chicken. Show all posts

Tuesday, February 9, 2010

Potstickers for Pasta?

With Chinese New Year round the corner, I've started the time consuming effort of making Jiao Zi (Chinese Dumplings) way in advance. I'm also taking a break from pasta recipes (although, dumplings are sort of like a pasta right? Aren't raviolis the same thing, just a different shape?) so a post on dumplings seem to be in quite good order.

I started learning to make them when I was in living in England - a northern Chinese girl taught me. She did not know how to cook, but knew how to make dumplings since it was tradition in her family! The hardest part of it is making the skin, and pinching the ends together to form an ingot looking pouch. Getting the dough right is much like making pasta. You learn it right once, and you know it forever. It's very simply, a combination of flour, water, salt, and a bit of oil. I know some versions add egg, but I tend to stay away from it.


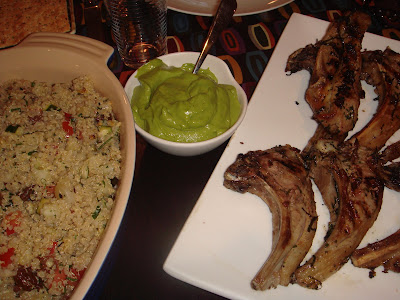
My little creations - ingot pouch dumpling for good luck on CNY!

To get it nice and thin, I usually suck it up and use a rolling pin, however, I'm sure you can use a pasta roller which will work just as well. These days, unless there's a very good reason to make the skin by hand, I'm picking it up from the Chinese Market for $1.39 - I would say the opportunity cost is worth it.

The fillings vary, but traditionally, the ingredients are: Pork, Dried Shrimp, Chives, Dried Mushrooms, Napa Cabbage & Ginger, seasoned with sesame oil, salt, and white pepper. The trick to getting the filling to just the right tasty-ness is to fry up a small ball of the filling, taste it then adjust for seasonings before stuffing the dumplings!. It seems so simple, but many people skip this step, and then wonder why their dumplings were not salty enough, or too sweet, etc etc.

This year, I'm having dinner with some folks that don't eat pork, so I had to make a chicken dumpling in addition to the regular ones, and I thought I'd share this one with you. Plus, I have a feeling most of my readers are lazy cooks like me, and don't really relish chopping everything into tiny bits that have to be of equal size, and the chicken dumplings have significantly less ingredients.

You also don't have to pleat the dumplings for this - simply sealing the skin with some warm water will do, but try to make sure that all the air pockets are expelled! To cook, boil, or do it pot stick style - brown the dumplings in a non-stick pan, then add 1/2 cup water, cover, and steam until fillling is cooked through. Now look, if you're absolutely "gian" to learn how to pleat, go here.

Here's the recipe for Chicken Jiao Zi

Makes about 20 dumplings

1 ea Chicken Breast, large (about 1/2 lb)
2 stalks Green Chives, Minced
4 stalks Yellow Chives, Minced
1 Tbs Minced Ginger
2 ea Dried Chinese Mushrooms, reconstituted, and minced
2 Tsp Sesame Oil
1 tsp Cornstarch
20 ea Dumpling Skins (for Potstickers or Gyoza)

Salt & White Pepper to Taste

1. Combine all the ingredients together, except for the dumpling skins
2. Season with salt and pepper
3. Fry up a small ball of the filling and adjust seasoning accordingly
4. Press a teaspoon full of filling into the center of a dumpling skin
5. Using your finger, wet the edges of the dumpling skin, and fold over the meat to seal
6. Store in the fridge, or freeze to keep for about 1 month
7. To cook, boil until dumplings float, or pan-fry in a little oil, add 1/2 cup water, cover, to steam

Sunday, November 8, 2009

Chef Laura's Easy Entertaining Cooking Class!

One of my biggest passions in addition to cooking is teaching, and what better way to combine the two than to host a cooking class!

Because this was organized by SGConnect, I had little insight to the skill and interest levels of the participants. So, to keep things interesting, I opted for more unusual ingredients, but stuck with the simple technique.

We had the privilege of using Ben's & Unhui's kitchen in Oakland, and it is the perfect setting for a group class, with an island in the middle, and tons of space to walk around.

The class started with a little getting to know you session, with each group of 2 or 3 bidding for their project.


I had a ton of fun teaching the class, and I think everyone learned at least one thing!


Knife Skills - Small Dice, Batons, Mince


Boning & Butterflying a Whole Chicken


Sauce Making 101
Roasting Vegetables without a Grill
Folding & Whipping Techniques in Dessert Making

After about 1.5 hrs of hard core cooking and preparation, we had a short Plating & Presentation 101 session on how to make food look good, before partaking in the feast!


Crab Salad with Melon


Caramelized Garlic Roasted Chicken, with Heirloom Tomato Sauce


Creamy Parmigiana Polenta

Salsa Verde Salad with Buffalo Mozzarella


Peanut Butter & Banana Pie

This was a great idea to get to build connections with strangers or stronger bonds with your friends. There's something about preparing a meal together that draws people closer together, and afterwards, when you feast, you can really taste the fruit of your labor!


For a session like this, contact me at cheflaurafu@gmail.com

*Photos Courtesy of Mark Sin - More here

Thursday, August 20, 2009

Attempts to be a Rising TV Star

I hardly ever get a chance to cook Singaporean food because it's so damned tedious, and I have this urge to always make stuff from scratch. But, but, there are always exceptions to the rule. For instance, last Saturday, when I was given the chance to be on a Singaporean TV show (just after my birthday as well, so it could have been considered somewhat of a birthday present). The show was about Overseas Singaporean community getting their fix of Hawker Food, so it was inevitable that I had to make Singaporean Food.


The whole spread, mine is in the middle

The easiest thing I could think of is the quintessential Chicken Rice, which I knew would not take too much prep work, (as opposed to something like Hokkien Mee, which would render my house smelling like prawns for ever, and everyone knows I don't eat shrimp) and a Nonya Dessert that's somewhat a specialty and quite unique (you never see it in restaurants).

I hadn't done these two recipes in maybe about 3 years, so I was a bit nervous about the outcome, but really, I'm not sure why I worry so much. It was quite awesome, and many people asked for the recipes, so I'm posting it here. To save time and energy, I dumb everything down, but really, when chicken rice is so far away, you can't tell the difference. The "secret ingredient" is of course the rendered chicken fat - come on, it's only 2 tablespoons! But if you're squeamish about it, go ahead and use sesame oil instead.


Rendering Chicken Fat

Hainanese Chicken Rice

Serves 6

Chicken:
1 ea Chicken
1 oz Ginger
5 clove Garlic
2 bunches Green Onion
2 strips Pandan/Screwpine Leaves


Rice:
2 cups Thai Long Grain Rice
2 Tbs Rendered Chicken Fat
2 oz Shallot
2 oz Ginger
2 oz Garlic
2 bunches Green Onion
1 Tbs Salt
3 strips Pandan/Screwpine Leaves, Tied into a knot
2 cups Chicken Broth (from cooking the chicken)


1. Stuff the Chicken with the the rest of the ingredients
2. Bring a large pot of water (large enough to fit the chicken) to a boil
3. Put the chicken into the pot, breast side up and simmer for about 30 minutes, or until juices run clear at thighs when pierced
4. Remove the chicken from the pot, and leave to cool. If you're feeling adventurous, dunk the chicken in ice water to stop the cooking for the very authentic lukewarm feeling
5. Reserve the cooking liquid, and reduce to 2 cups for the rice
6. For the rice, process the shallot, ginger, garlic, green onion and salt to make a chicken rice paste - you can do this days ahead and store.
7. Heat the fat in a wok until smoking hot, the add the paste and stir fry until it's fragrant, but not browned
8. Add the rice to the wok and cook until the rice starts to turn opaque
9. Transfer the rice into another pot and add the chicken broth and Pandan Leaf Knot
10. Cover pot and as soon as liquid comes to a boil, turn down to a very gentle simmer for around 15 minutes
11. Fluff the rice, carve the chicken, and serve with the chili sauce (recipe below)


Chicken Rice Chili


4 oz Red Jalapenos or Fresh red chilis
1 oz Shallot
5 cloves Garlic
1 ea Lime Juice
1 cup Chicken Broth

Salt to Taste

1. Process the first 3 ingredients together
2. Add the liquids and simmer on the stove about 15 minutes
3. Season to taste

Friday, May 22, 2009

Dinner in 30 Minutes (How To)

In anticipation of the major food fest that I'll be getting when I get to Korea, I whet my appetite last night with a healthy home cooked dinner. I had some leftover produce anyway, and wanted to use it up. Fridge inventory check revealed - 1 bag of Bloomsdale Spinach, 2 avocados, and chicken breasts.

Pantry staples that contributed to this meal - Quinoa, Garlic, Anchovies, Olive Oil, Lemon Juice

From the Garden - Thyme

After setting quinoa on the stove, I made delicious green goddess dressing by mincing up the garlic, and then combining that with the avocado, lemon juice, olive oil & anchovies in the food processor (10 minutes). Then, I marinated the chicken breasts in some balsamic vinegrette, the garden thyme, olive oil & salt, before firing up the grill. Once the chicken breasts were marked on both sides (10 minutes), I closed the hood then went back to cook the spinach.

I love spinach because it's absolutely so healthy, delicious, versatile, and best of all, easy to cook. In a large sauce pan, a splash of water, add all the spinach and then cover for about 10 minutes. By the way. this timing works for farmed spinach, but if you want to get that wilty stuff in a bag, then cover for 1 minute instead.

Just when the spinach was done, the chicken was ready to come off the grill, and the quinoa was also well prepared and fluffy.

It's amazing what a good sauce can do to zazzle up some simple ingredients, and it doesn't always have to take a day to make!

Here's the recipe for a green goddess dressing

Green Goddess Dressing

Makes 1 cup

2 ea Avocados
2 fillet Anchovies
3 ea Garlic Cloves, minced
1 tbsp Lemon Juice
1/4 cup Olive Oil

Salt & Pepper to taste

If desired, 1 egg yolk for added richness

1. Pulse all ingredients except oil in a food processor until smooth
2. With processor running, slowly add the olive oil in a stream until incorporated
3. Add salt & pepper to taste

If making ahead, cover tightly with plastic wrap to prevent browning

Monday, May 4, 2009

Burrito a la Calafia

I made a californian burrito for dinner last night. It was the most delicious non-traditional burrito I've ever had. Don't get me wrong - I really love my carnitas, and salsa verde super burrito with sour cream, guac, the works, etc (secretly I even sometimes crave for chipotle, even though La Vics still comes up top). But last night's burrito, well, that was something else.

So what exactly is a californian burrito? In my books, it' a burrito that has ingredients that are decidedly californian, or exhibit properties of "californian cuisine", (which I define as a fine juxtaposition of flavors from east to west, but always firmly grounded on fresh and local produce).

Side note about the Burrito - when I was at Masa's there were these two servers, a pair of brothers, Hugo & Victor. Hugo once swore to me that the Burrito originated in California, because when he was in Mexico growing up, there didn't exist such a thing as the burrito as we know it, What d'ya know, maybe all burritos are californian after all!

Anyway, it started off with some cold grilled sancho seasoned chicken breast, that I had used to test-drive the new grill with. By the way, I was in a hurry to do the test run because this Friday we have a Gigya BBQ, and if the grill doesn't work, I'm pretty sure there would be a host of disappointment. Anyway, the grill worked perfectly, but then we had to leave for dinner & the Opera, so I stuck the grilled chicken in the fridge. I'm not even sure what possessed me to use sancho.

Sunday dinners are always a blur, and I usually try to make stuff out of leftovers, so this was no exception. Plus, in the afternoon, I made an awesome romesco sauce (which is another story in itself), and felt like that would stand in well for salsa! For your information, the romesco sauce is also for that BBQ which is happening later in the week.

Not to mention, I picked up a ripe hass avocado (now everyone knows there's nothing more californian than a hass avocado), and had a leftover tomato from the romesco sauce to make an awesome guacamole.

Back to leftovers, I had the shredded cheddar cheese from the previous week's sausage casserole, and also leftover tortillas from when I went snowboarding and made breakfast burritos for everyone. Yes, I know that was a while ago, but tortillas keep pretty well ok?

So anyway, I piled the sliced sancho chicken, guacamole, cheese and romesco sauce on a giant tortilla, rolled it up and then stuck it in the toaster oven at 450F for about 15 minutes, just enough to get everything hot.

And then, I bit into it.

Oh yum. The cheese was melted, and the romesco sauce was just all over the chicken so that it didn't dry out. Plus, that Hass Guac - mmmmm, the perfect rich mouth feel that you have to have with a good burrito. It was healthy too!

I think it'll be on the menu for a while.

Californian Burritos

Serves 2

2 ea Flour Tortilla
1 ea Chicken Breast, seasoned, grilled or roasted and sliced
1/2 cup Cheese Shredded
1/2 cup Romesco sauce or jar salsa
Guac from 1 Avocado

Preheat the oven to 450F
Seperate all the ingredients and pile them onto each tortilla shell
Roll the tortilla up and stick it in the oven for 15 minutes


Here's how I make my guac:
1 Avocado, peeled, stoned & sliced
1 Roma Tomato, small dice
1 Garlic Clove, minced
1 Tbs Yellow onion, minced
1 stalk Green Onion, chopped
Juice of half a meyer lemon (if possible, if not regular lemons are fine too)
Salt & pepper

Mash the avocado, then mix in all the other ingredients well
Generously season with salt