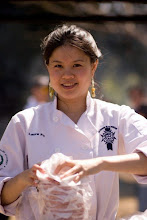
I've sunk back into a lull of not blogging; but I did want to share a very easy pasta recipe that I made when the family was in town.
Overwhelmed with the harvest of tomatoes, and also a request for pasta on a steak night, I threw together something entirely from the garden.
It's a light, tangy, tomato sauce, and perfect for a late summer evening. The best part of it? It only takes 5 ingredients & 15 minutes!
Summer Fresh Tomato Pasta
Serves 4
2 cups Tomatoes, diced/halved if cherry
3 cloves garlic, sliced
1 ea lemon, zested & juiced
1/2 cup Basil, chiffonade
2 tbs Olive Oil
Salt & Pepper to taste
4 servings noodle pasta, cooked according to directions
Heat olive oil in a heavy pan, add garlic, and cook till tender, but not browned
Add the tomatoes, lemon juice & lemon zest
Cook on high until tomatoes are soft, and liquid is mostly cooked down, depending on how thick you like the sauce
Season to taste
Stir in the basil chiffonade
Toss with pasta & serve
Showing posts with label Easy Entertaining. Show all posts
Showing posts with label Easy Entertaining. Show all posts
Thursday, October 20, 2011

Wednesday, May 4, 2011
Hors D'oeurves in 15 Minutes
I love Easter - traditionally I've always done a big lunch, or contributed with an entree, like last year, where, as a guest I signed up for the roasted lamb; marinated in fennel and green garlic (my favorite lamb recipe)and quinoa salad.
This year, with the little monkey to attend to, I was asked to make hors d'oeurves instead. Not having very much prep time, and also low on my tank of energy, it was imperative that anything I make would be simple, tasty, and of course live up to my reputation as Chef Laura.
It didn't take me too long to figure out that bacon wrapped dates and gougeres where the two best options.
Bacon wrapped dates have, for a long time been a perennial favorite. I love the sweet salty taste of it, and usually combine it with a blue cheese garlic sauce that adds some good kick to it. Also, the name of the dish really describes the recipe. That's all there is to it - except that, of course, you have to bake it until the bacon is cooked. (I like using the uncured bacon from Trader Joes)
Gougeres, or cheese puffs, on the other hand, do require a recipe. They are the epitome of an amuse bouche. Light, yet whetting your appetite, causing you to want more! The first time I made these were way back when I was in junior high. Not having very much experience, they were crunchy for all of two seconds, and then immediately sagged after coming out of the oven. Regardless, they were delicious. The nutty cheese and the light dough (chewy instead of crunchy) actually resulted in me making them the wrong way more than once!
Years later, (without engaging the recipe again) I finally learned the proper way to make them. The secret lies in two thing. One, cooling off the dough before adding the eggs, and two, making sure each egg is fully incorporated before the next one is added. Make sure that you no longer can see steam coming from the dough before the eggs are added. This excess moisture is what contributes to the "sagging". When adding the eggs, you want to quickly beat it into the dough, lest it cook from the heat before incorporating.
You'll get the most success using an electric mixer with a paddle attachment, but it is sometimes too cumbersome to break out the mixer just for this. As an alternative, you will need some very good fore arm strength, either yours or someone else's. If you do it the manual way, use a wooden spoon to do the whole thing, beating very vigorously throughout the whole process.
As an added bonus, after the gougeres are cooked, turn the oven off, and leave the door cracked with the gougeres still in them to let them dry out a bit. This also helps them retain their crunchiness after coming out of the oven.
Here's the recipe:
Gougeres
Makes about 4 dozen hors d'oeurves
1/2 cup Water
1/2 cup Milk
4 oz Unsalted butter
1 cup All Purpose flour
4 ea Eggs
4 oz Hard cheese (Gruyere, cheddar, semi soft blue will work too)
Large pinch of Salt, Pepper and ground Nutmeg
1. Preheat the oven to 400°. Line 2 baking sheets with parchment paper.
2. In a saucepan, combine the water, milk, butter and salt and bring to a boil.
3. Add the flour and stir with a wooden spoon until a smooth dough forms
4. Stir over low heat until dough leaves a film on bottom of pan; about 2 minutes
5. Scrape the dough into a bowl; beat vigorously with wooden spoon or in a mixer with the paddle attachment until no longer steaming about 1-2 minutes.
6. Add one egg into the dough, quickly stirring or beating until egg is properly combined
7. Repeat with remaining eggs, making sure that each egg is fully incorporated before the next is added
8. Add the cheese and a pinch each of pepper and nutmeg and combine
9. Transfer the dough to a pastry bag fitted with a 1/2-inch round tip and pipe quarter sized mounds (or 1 teaspoon each) onto the baking sheets about 1 inch apart. Press peaks down with a wet finger to prevent brown spots
10. Bake for 22 minutes, or until puffed and golden brown.
11. Serve immediately
After dough is portioned and piped (step 9), it can be frozen, then stored.
Place frozen dough on baking sheet when ready to cook, and bake for an extra 5-10 minutes, lowering heat to 375 after 25 minutes if tops get too brown
This year, with the little monkey to attend to, I was asked to make hors d'oeurves instead. Not having very much prep time, and also low on my tank of energy, it was imperative that anything I make would be simple, tasty, and of course live up to my reputation as Chef Laura.
It didn't take me too long to figure out that bacon wrapped dates and gougeres where the two best options.
Bacon wrapped dates have, for a long time been a perennial favorite. I love the sweet salty taste of it, and usually combine it with a blue cheese garlic sauce that adds some good kick to it. Also, the name of the dish really describes the recipe. That's all there is to it - except that, of course, you have to bake it until the bacon is cooked. (I like using the uncured bacon from Trader Joes)
Gougeres, or cheese puffs, on the other hand, do require a recipe. They are the epitome of an amuse bouche. Light, yet whetting your appetite, causing you to want more! The first time I made these were way back when I was in junior high. Not having very much experience, they were crunchy for all of two seconds, and then immediately sagged after coming out of the oven. Regardless, they were delicious. The nutty cheese and the light dough (chewy instead of crunchy) actually resulted in me making them the wrong way more than once!
Years later, (without engaging the recipe again) I finally learned the proper way to make them. The secret lies in two thing. One, cooling off the dough before adding the eggs, and two, making sure each egg is fully incorporated before the next one is added. Make sure that you no longer can see steam coming from the dough before the eggs are added. This excess moisture is what contributes to the "sagging". When adding the eggs, you want to quickly beat it into the dough, lest it cook from the heat before incorporating.
You'll get the most success using an electric mixer with a paddle attachment, but it is sometimes too cumbersome to break out the mixer just for this. As an alternative, you will need some very good fore arm strength, either yours or someone else's. If you do it the manual way, use a wooden spoon to do the whole thing, beating very vigorously throughout the whole process.
As an added bonus, after the gougeres are cooked, turn the oven off, and leave the door cracked with the gougeres still in them to let them dry out a bit. This also helps them retain their crunchiness after coming out of the oven.
Here's the recipe:
Gougeres
Makes about 4 dozen hors d'oeurves
1/2 cup Water
1/2 cup Milk
4 oz Unsalted butter
1 cup All Purpose flour
4 ea Eggs
4 oz Hard cheese (Gruyere, cheddar, semi soft blue will work too)
Large pinch of Salt, Pepper and ground Nutmeg
1. Preheat the oven to 400°. Line 2 baking sheets with parchment paper.
2. In a saucepan, combine the water, milk, butter and salt and bring to a boil.
3. Add the flour and stir with a wooden spoon until a smooth dough forms
4. Stir over low heat until dough leaves a film on bottom of pan; about 2 minutes
5. Scrape the dough into a bowl; beat vigorously with wooden spoon or in a mixer with the paddle attachment until no longer steaming about 1-2 minutes.
6. Add one egg into the dough, quickly stirring or beating until egg is properly combined
7. Repeat with remaining eggs, making sure that each egg is fully incorporated before the next is added
8. Add the cheese and a pinch each of pepper and nutmeg and combine
9. Transfer the dough to a pastry bag fitted with a 1/2-inch round tip and pipe quarter sized mounds (or 1 teaspoon each) onto the baking sheets about 1 inch apart. Press peaks down with a wet finger to prevent brown spots
10. Bake for 22 minutes, or until puffed and golden brown.
11. Serve immediately
After dough is portioned and piped (step 9), it can be frozen, then stored.
Place frozen dough on baking sheet when ready to cook, and bake for an extra 5-10 minutes, lowering heat to 375 after 25 minutes if tops get too brown
Sunday, December 12, 2010
The long awaited update (Pictures coming soon)
It's been a while since I've blogged anything, but I did have a highlight for July, (yes, I'm several months behind), where I gave another cooking class for a blushing bride to be!
It probably was a really good gift, come to think of it - Young brides these days seldom spend too much time in the kitchen, but will probably be expected to host a dinner party or two, now that they're married. The bride loves to cook as well, so it was also a really fun time for her. Her maids all put on their aprons and whipped out their spoons to produce a spectacular meal that was easy, fresh, and absolutely delicious. It was definitely a meal that she could prepre in the future!
As we cooked, I gave demonstrations on proper sautee methods, some basic knife skills, like the chiffonade and mincing, and some other cooking techniques that were learned were the art of slow roasting salmon, dessert making, and plating 101.
Here's the menu:
Spring Pea Soup
Garnished with truffle scented scream
Wild Mushrooms on Polenta Cakes
Slow Roasted Salmon
Served with Gremolata
Panzanella , Italian Bread Salad
Olive Oil Cake
Served with Roasted Peaches and sweet crème fraiche
We lunched over the feast, and discussed flavors, favorite dishes, and also cooking and eating best practices at home.
It probably was a really good gift, come to think of it - Young brides these days seldom spend too much time in the kitchen, but will probably be expected to host a dinner party or two, now that they're married. The bride loves to cook as well, so it was also a really fun time for her. Her maids all put on their aprons and whipped out their spoons to produce a spectacular meal that was easy, fresh, and absolutely delicious. It was definitely a meal that she could prepre in the future!
As we cooked, I gave demonstrations on proper sautee methods, some basic knife skills, like the chiffonade and mincing, and some other cooking techniques that were learned were the art of slow roasting salmon, dessert making, and plating 101.
Here's the menu:
Spring Pea Soup
Garnished with truffle scented scream
Wild Mushrooms on Polenta Cakes
Slow Roasted Salmon
Served with Gremolata
Panzanella , Italian Bread Salad
Olive Oil Cake
Served with Roasted Peaches and sweet crème fraiche
We lunched over the feast, and discussed flavors, favorite dishes, and also cooking and eating best practices at home.
Friday, June 25, 2010
Keep Calm & Carry On
I can never turn away a hungry person.
Largely, the joy in cooking comes from seeing others enjoy my food, and while it's a rare gift to always be able to satisfy an appetite, I've learned to use it well.
I've also made it a habit to always have something available in my fridge, so that I can put together a meal quickly and easily, because often, there isn't time to go to the store when I have surprise guests.
By far, my most outstanding meal, was a dinner that I prepared for 6 people (myself included), with about 5 minute notice. I had some friends stop by, and invited them to dinner - so it was originally just 3 people at the last minute. Then, friends of friends showed up, and within minutes, the dinner table had expanded 100% to 6 people.
The initial dinner plan for 3 people was a light & casual gnocchi dish with bacon and peas, tossed in that awesome Pesto a le Monde. However, with this extended guest list, I had to think of something more appropriate (That would severely undermine my talent as a chef). The bacon and peas were already in the pan cooking, and so I decided to extend this and make a creamy pesto sauce, and toss it with spaghetti instead.
Pancetta and Peas is always super successful, so I brought the technique of mixing in egg yolk and cream into the sauce to stretch out that last bit of pesto that I had left.

In line with my philosophy to always store something in the fridge, I quick braised some frozen OMG meatballs in a half bottle of red wine that I also had left from spaghetti & meatballs a week ago.

Now that I had the entree and side protein sorted out - the only thing that was missing was a salad. My cheese drawer had some fresh bocconcini, so I tossed that with some fresh avocado, good olive oil (a must have in anyone's pantry), and ripe apricots, which are of course in season right now.

To much surprise, it really wasn't that difficult to pull off, and really, I could never turn strangers away, for without knowing, some have entertained angels in disguise.

Pesto, Peas, and Pasta
Serves 6
8 oz Bacon Rashers, diced
12 oz Frozen Peas
1 cup Pesto
1 cup Half & half
4 ea Egg Yolks
1 cup Grated Parmesan Cheese
6 portions Noodle Pasta, like linguine, fettucine, or spaghetti
1. Bring a pot of heavily salted water to a boil, and add the noodles
2. In a smaller pot, add scald the half and half, and reduce by about half
3. Heat a heavy sautepan, and add the bacon rashers, until browned
4. Remove most of the bacon drippings, leaving about 2 tablespoons
5. Add the frozen peas, and cover, cooking till peas are thawed out and hot
6. Quickly whisk the egg yolks and slowly temper in the hot half and half
7. Strain pasta, and then toss egg mixture, peas, bacon, and parmesan together
8. Season with freshly cracked pepper and serve immediately
Largely, the joy in cooking comes from seeing others enjoy my food, and while it's a rare gift to always be able to satisfy an appetite, I've learned to use it well.
I've also made it a habit to always have something available in my fridge, so that I can put together a meal quickly and easily, because often, there isn't time to go to the store when I have surprise guests.
By far, my most outstanding meal, was a dinner that I prepared for 6 people (myself included), with about 5 minute notice. I had some friends stop by, and invited them to dinner - so it was originally just 3 people at the last minute. Then, friends of friends showed up, and within minutes, the dinner table had expanded 100% to 6 people.
The initial dinner plan for 3 people was a light & casual gnocchi dish with bacon and peas, tossed in that awesome Pesto a le Monde. However, with this extended guest list, I had to think of something more appropriate (That would severely undermine my talent as a chef). The bacon and peas were already in the pan cooking, and so I decided to extend this and make a creamy pesto sauce, and toss it with spaghetti instead.
Pancetta and Peas is always super successful, so I brought the technique of mixing in egg yolk and cream into the sauce to stretch out that last bit of pesto that I had left.
In line with my philosophy to always store something in the fridge, I quick braised some frozen OMG meatballs in a half bottle of red wine that I also had left from spaghetti & meatballs a week ago.
Now that I had the entree and side protein sorted out - the only thing that was missing was a salad. My cheese drawer had some fresh bocconcini, so I tossed that with some fresh avocado, good olive oil (a must have in anyone's pantry), and ripe apricots, which are of course in season right now.
To much surprise, it really wasn't that difficult to pull off, and really, I could never turn strangers away, for without knowing, some have entertained angels in disguise.
Pesto, Peas, and Pasta
Serves 6
8 oz Bacon Rashers, diced
12 oz Frozen Peas
1 cup Pesto
1 cup Half & half
4 ea Egg Yolks
1 cup Grated Parmesan Cheese
6 portions Noodle Pasta, like linguine, fettucine, or spaghetti
1. Bring a pot of heavily salted water to a boil, and add the noodles
2. In a smaller pot, add scald the half and half, and reduce by about half
3. Heat a heavy sautepan, and add the bacon rashers, until browned
4. Remove most of the bacon drippings, leaving about 2 tablespoons
5. Add the frozen peas, and cover, cooking till peas are thawed out and hot
6. Quickly whisk the egg yolks and slowly temper in the hot half and half
7. Strain pasta, and then toss egg mixture, peas, bacon, and parmesan together
8. Season with freshly cracked pepper and serve immediately
Monday, June 21, 2010
Pesto a le Monde
Pesto is one of things things that you always want to have in your fridge. It keeps and freezes well, and you can use it on almost anything - from pasta sauce to chicken marinade, and then a sauce for meats.
Most international cuisines have some sort of pesto - a mixture of herb, garlic, and oil. There's gremolata, chimichurri, and of course, by far the most famous, the pesto classico - a gorgeous combination of fresh basil, garlic, pine nuts, Parmesan, and then some good olive oil. Yum. Now that summer is here, my basil plant is a lot like my life right now - overflowing with abundance :)
Don't get me wrong - while the original is still the best, mixing it up here allows me to get creative, and also shows what a simple ingredient switch can make a dish completely different, but still delicious; somewhat of a deja vu.
Pine nuts tend to be ridiculously expensive, so this time, I chose to go with roasted almonds instead. You can actually use almost any kind of nut, but roasted nuts bring out a smokier flavor than the blah uncooked ones.
I made about 2 cups with this, and then had a bit leftover, which saved my life the next day, when I had to make dinner for 6 on 5 minutes notice.
That's another pasta recipe, but here's the pesto - there's only one secret to good pesto. Never ever use pre-grated Parmesan.
Almond Pesto
1 cup loosely packed Basil leaves
4 cloves Garlic, finely minced
1/3 cup Roasted Almonds
1/2 cup Parmesan cheese, grated
1/2 ea Lemon, juiced
2/3 cup Good Olive oil
Salt & pepper to taste
Makes about 2 cups
Combine all ingredients except olive oil in a food processor
Process until roughly chopped
Gradually add olive oil in a stream until pesto is finely minced
Season with salt & pepper
Toss with pasta for a quick meal, serve hot or cold
Most international cuisines have some sort of pesto - a mixture of herb, garlic, and oil. There's gremolata, chimichurri, and of course, by far the most famous, the pesto classico - a gorgeous combination of fresh basil, garlic, pine nuts, Parmesan, and then some good olive oil. Yum. Now that summer is here, my basil plant is a lot like my life right now - overflowing with abundance :)
Don't get me wrong - while the original is still the best, mixing it up here allows me to get creative, and also shows what a simple ingredient switch can make a dish completely different, but still delicious; somewhat of a deja vu.
Pine nuts tend to be ridiculously expensive, so this time, I chose to go with roasted almonds instead. You can actually use almost any kind of nut, but roasted nuts bring out a smokier flavor than the blah uncooked ones.
I made about 2 cups with this, and then had a bit leftover, which saved my life the next day, when I had to make dinner for 6 on 5 minutes notice.
That's another pasta recipe, but here's the pesto - there's only one secret to good pesto. Never ever use pre-grated Parmesan.
Almond Pesto
1 cup loosely packed Basil leaves
4 cloves Garlic, finely minced
1/3 cup Roasted Almonds
1/2 cup Parmesan cheese, grated
1/2 ea Lemon, juiced
2/3 cup Good Olive oil
Salt & pepper to taste
Makes about 2 cups
Combine all ingredients except olive oil in a food processor
Process until roughly chopped
Gradually add olive oil in a stream until pesto is finely minced
Season with salt & pepper
Toss with pasta for a quick meal, serve hot or cold
Monday, May 10, 2010
Cloudy with a Chance of Meatballs
Did a Mother's Day lunch for a special family over the weekend, and as usual, everything was fabulous, but I got the most props on my famous meatballs, so I'm posting it here!
The secret to making great tasting meatballs? Just use ingredients that you're familiar with, and always, always, do a taste test before you roll them out! If you can let the flavors marinate overnight before rolling them out, even better.
The other great thing about this is that it freezes really well, and you can always have a stash for a quick appetizer, or something to throw into a red pasta sauce for spaghetti & meatballs; but that's only if it lasts that long!
Enjoy ~
Chef Laura's OMG Meatballs
Makes 36, 1 oz meatballs
1/2 lb Ground Beef
1/2 lb Sweet Italian Sausage
1/2 each Onion, sliced into half moons
1/4 cup Sundried tomatoes in oil, chopped
2 cloves Garlic, minced
1/2 cup Feta, Crumbled
2 Tbs Parmesan Cheese
2 Tbs Breadcrumbs
1 tsp Paprika
2 Tbs Olive Oil
Salt & Pepper to taste
1. Heat the oil in a heavy saute pan
2. Add the onion slices, and caramelize on medium until golden brown, about 20 minutes (keep stirring or this burns)
3. Remove from heat, and let cool; chop into a rough paste
4. Combine all the remaining ingredients in a bowl
5. Use your hands to mix well, season with salt & pepper
6. Do a taste test by frying up a small portion of the mixture
7. Divide mixture into 1 oz portions, and roll into balls
8. Arrange meatballs on metal tray and freeze
9. Once frozen, store in airtight container or zip lock bags for up to 3 months
10. When ready to use, arrange meatballs in a single layer on a baking sheet at bake at 400F for 10 minutes
Spinach Yogurt Sauce
2 cups Spinach leaves
2 Tbs Olive Oil
1 cup Greek Yogurt
2 cloves Garlic, sliced
Salt & Pepper to taste
1. Heat the oil in a saute pan, and cook the spinach until wilted
2. Using a food processor, combine all ingredients, and pulse till spinach is finely chopped
3. Store in an airtight container overnight before using, this allows the flavor to develop
The secret to making great tasting meatballs? Just use ingredients that you're familiar with, and always, always, do a taste test before you roll them out! If you can let the flavors marinate overnight before rolling them out, even better.
The other great thing about this is that it freezes really well, and you can always have a stash for a quick appetizer, or something to throw into a red pasta sauce for spaghetti & meatballs; but that's only if it lasts that long!
Enjoy ~
Chef Laura's OMG Meatballs
Makes 36, 1 oz meatballs
1/2 lb Ground Beef
1/2 lb Sweet Italian Sausage
1/2 each Onion, sliced into half moons
1/4 cup Sundried tomatoes in oil, chopped
2 cloves Garlic, minced
1/2 cup Feta, Crumbled
2 Tbs Parmesan Cheese
2 Tbs Breadcrumbs
1 tsp Paprika
2 Tbs Olive Oil
Salt & Pepper to taste
1. Heat the oil in a heavy saute pan
2. Add the onion slices, and caramelize on medium until golden brown, about 20 minutes (keep stirring or this burns)
3. Remove from heat, and let cool; chop into a rough paste
4. Combine all the remaining ingredients in a bowl
5. Use your hands to mix well, season with salt & pepper
6. Do a taste test by frying up a small portion of the mixture
7. Divide mixture into 1 oz portions, and roll into balls
8. Arrange meatballs on metal tray and freeze
9. Once frozen, store in airtight container or zip lock bags for up to 3 months
10. When ready to use, arrange meatballs in a single layer on a baking sheet at bake at 400F for 10 minutes
Spinach Yogurt Sauce
2 cups Spinach leaves
2 Tbs Olive Oil
1 cup Greek Yogurt
2 cloves Garlic, sliced
Salt & Pepper to taste
1. Heat the oil in a saute pan, and cook the spinach until wilted
2. Using a food processor, combine all ingredients, and pulse till spinach is finely chopped
3. Store in an airtight container overnight before using, this allows the flavor to develop
Friday, April 16, 2010
Gigya's Winning Chile Verde Recipe
To celebrate the close of an extremely successful Q1, Gigya held a Chili Cookoff in conjunction with poker night. I might have lost all my money at poker, but I did win a $100 with my award winning Chile Verde. I promised to post the recipe if I won, so here it is!

Although chile verde is usually made with pork, (and you can definitely use that meat if you prefer), I used oxtail for this one because it's a slightly richer meat that's not often found in restaurants.
The chile verde sauce also works really well as a side sauce for meats and fish, if you're using it that way, omit the onion, and add 1/2 cup of olive oil.
Good luck!
Gigya's Oxtail Chile Verde
Serves 8
5 lbs Oxtail
4 cups Chile Verde
2 Tbs Oil
Chicken broth
Salt & pepper to taste
Heat the oil in a large sauce pan, and sear the oxtail on all sides, until nicely browned
To this in batches as necessary
Add the chile verde sauce, and enough chicken broth to cover the oxtail
Cover pot and braise in a 320F oven for about 2.5 hrs or until meat falls off the bone
Pick the meat off the bone and serve hot
Season to taste
Optional Garnish: Sour cream, queso fresca, cilantro
Chile Verde Sauce
Makes about 4 cups
4 ea Poblano Chilies
3 ea Jalapeno Chilies
8 ea Anaheim Chilies
6 ea Tomatillos
4 ea Green Onions
1 ea Green Pepper
3 ea Limes, juiced
1 ea Yellow onion
4 cloves Garlic
1 bu Cilantro
Salt to taste
Roast the peppers and tomatillos until skin is charred
Leave to cool, then peel peppers
Combine all ingredients in a blender
Season to taste
To serve as a sauce, omit the yellow onion, and add 1/2 cup olive oil when processing
Although chile verde is usually made with pork, (and you can definitely use that meat if you prefer), I used oxtail for this one because it's a slightly richer meat that's not often found in restaurants.
The chile verde sauce also works really well as a side sauce for meats and fish, if you're using it that way, omit the onion, and add 1/2 cup of olive oil.
Good luck!
Gigya's Oxtail Chile Verde
Serves 8
5 lbs Oxtail
4 cups Chile Verde
2 Tbs Oil
Chicken broth
Salt & pepper to taste
Heat the oil in a large sauce pan, and sear the oxtail on all sides, until nicely browned
To this in batches as necessary
Add the chile verde sauce, and enough chicken broth to cover the oxtail
Cover pot and braise in a 320F oven for about 2.5 hrs or until meat falls off the bone
Pick the meat off the bone and serve hot
Season to taste
Optional Garnish: Sour cream, queso fresca, cilantro
Chile Verde Sauce
Makes about 4 cups
4 ea Poblano Chilies
3 ea Jalapeno Chilies
8 ea Anaheim Chilies
6 ea Tomatillos
4 ea Green Onions
1 ea Green Pepper
3 ea Limes, juiced
1 ea Yellow onion
4 cloves Garlic
1 bu Cilantro
Salt to taste
Roast the peppers and tomatillos until skin is charred
Leave to cool, then peel peppers
Combine all ingredients in a blender
Season to taste
To serve as a sauce, omit the yellow onion, and add 1/2 cup olive oil when processing
Sunday, November 8, 2009
Chef Laura's Easy Entertaining Cooking Class!
One of my biggest passions in addition to cooking is teaching, and what better way to combine the two than to host a cooking class!
Because this was organized by SGConnect, I had little insight to the skill and interest levels of the participants. So, to keep things interesting, I opted for more unusual ingredients, but stuck with the simple technique.
We had the privilege of using Ben's & Unhui's kitchen in Oakland, and it is the perfect setting for a group class, with an island in the middle, and tons of space to walk around.
The class started with a little getting to know you session, with each group of 2 or 3 bidding for their project.

I had a ton of fun teaching the class, and I think everyone learned at least one thing!

Knife Skills - Small Dice, Batons, Mince

Boning & Butterflying a Whole Chicken

Sauce Making 101
Roasting Vegetables without a Grill
Folding & Whipping Techniques in Dessert Making
After about 1.5 hrs of hard core cooking and preparation, we had a short Plating & Presentation 101 session on how to make food look good, before partaking in the feast!


Crab Salad with Melon

Caramelized Garlic Roasted Chicken, with Heirloom Tomato Sauce

Creamy Parmigiana Polenta
Salsa Verde Salad with Buffalo Mozzarella

Peanut Butter & Banana Pie
This was a great idea to get to build connections with strangers or stronger bonds with your friends. There's something about preparing a meal together that draws people closer together, and afterwards, when you feast, you can really taste the fruit of your labor!

For a session like this, contact me at cheflaurafu@gmail.com
*Photos Courtesy of Mark Sin - More here
Because this was organized by SGConnect, I had little insight to the skill and interest levels of the participants. So, to keep things interesting, I opted for more unusual ingredients, but stuck with the simple technique.
We had the privilege of using Ben's & Unhui's kitchen in Oakland, and it is the perfect setting for a group class, with an island in the middle, and tons of space to walk around.
The class started with a little getting to know you session, with each group of 2 or 3 bidding for their project.
I had a ton of fun teaching the class, and I think everyone learned at least one thing!
Knife Skills - Small Dice, Batons, Mince
Boning & Butterflying a Whole Chicken
Sauce Making 101
Roasting Vegetables without a Grill
Folding & Whipping Techniques in Dessert Making
After about 1.5 hrs of hard core cooking and preparation, we had a short Plating & Presentation 101 session on how to make food look good, before partaking in the feast!
Crab Salad with Melon
Caramelized Garlic Roasted Chicken, with Heirloom Tomato Sauce
Creamy Parmigiana Polenta
Salsa Verde Salad with Buffalo Mozzarella
Peanut Butter & Banana Pie
This was a great idea to get to build connections with strangers or stronger bonds with your friends. There's something about preparing a meal together that draws people closer together, and afterwards, when you feast, you can really taste the fruit of your labor!
For a session like this, contact me at cheflaurafu@gmail.com
*Photos Courtesy of Mark Sin - More here
Subscribe to:
Posts (Atom)